
Thursday, Jan 18, 2025
How to build a job application form
Forms
How to
Job Application Form

Digitizing your employee outreach efforts online offers many significant benefits compared to the traditional, brick-and-mortar approach of posting a flyer in your front window with the phrase “Accepting Applications” or “Now Hiring.” These benefits include the ability to combine your job advertisement and application into one seamless process. By creating an online job application form and publishing it on your company's website, you can effectively scale your recruitment efforts, maintain a dedicated and up-to-date page for new hires, increase administrative efficiency through automation, and, overall, create a much better experience for potential candidates who are applying to your company.
In the past, companies were required to create a job application form template using online software and then print the forms to distribute them. This paper-based process was cumbersome, and it led to unnecessary waste. Today, it's possible to completely eliminate paper in the job application process, which is not only good for the environment but also significantly streamlines the process of editing and maintaining changes to your job application form. For example, if your company's educational requirements change for a particular position, all you need to do is update the form by adding a new option to a dropdown, radio button, or checkbox. After making the update, simply click “Save,” and the changes will be immediately reflected on your form.
Now that we’ve touched on some of the key benefits of using a digital job application form, let's dive into the essential components every job application form should include. Below, we’ll highlight some of the most common and necessary fields to ensure your job application form is both well-rounded and professional for your company’s needs.
Input Fields Overview
When designing a job application form, you should carefully consider which fields are necessary to collect the right information from applicants. The following is a comprehensive list of fields that are commonly used in a job application form:
- 1. First and Last Name
- 2. Email Address
- 3. Phone Number
- 4. Position Applying For
- 5. Current Employer
- 6. Education
- 7. Special Skills
- 8. Resume Upload
- 9. Reference Upload
Each of these fields is important because they collect useful information not only for the hiring manager but also for the potential employee. These fields help ensure that both parties have all the necessary details to make informed decisions without the need for additional communication during the initial stages of the hiring process.
For instance, by collecting the first and last name, phone number, and email address, you have the essential contact information right from the start. Similarly, gathering details about the position an applicant is applying for, their current employer, and their educational background helps paint a clearer picture of their qualifications and experience.
Creating an Email Confirmation
One of the biggest advantages of an online job application form is the ability to send email confirmations to candidates immediately after they submit their applications. An email confirmation is a message that is automatically triggered once a job application form is successfully submitted. It typically includes the candidate’s submitted data, which allows them to know that their application has been received and is being processed.
A standard email confirmation should include a few key elements. First, you want to thank the applicant for applying to your company and reassure them that their application is in good hands. The email should also summarize the responses they submitted with the form, which helps them verify that their information was received correctly. These email confirmations are a powerful tool for reducing applicant anxiety and increasing the transparency of your application process.
Building the Job Application Form
Now, let’s break down the step-by-step process of building your job application form. To begin, let’s open the form builder in Likeable Forms and get started.
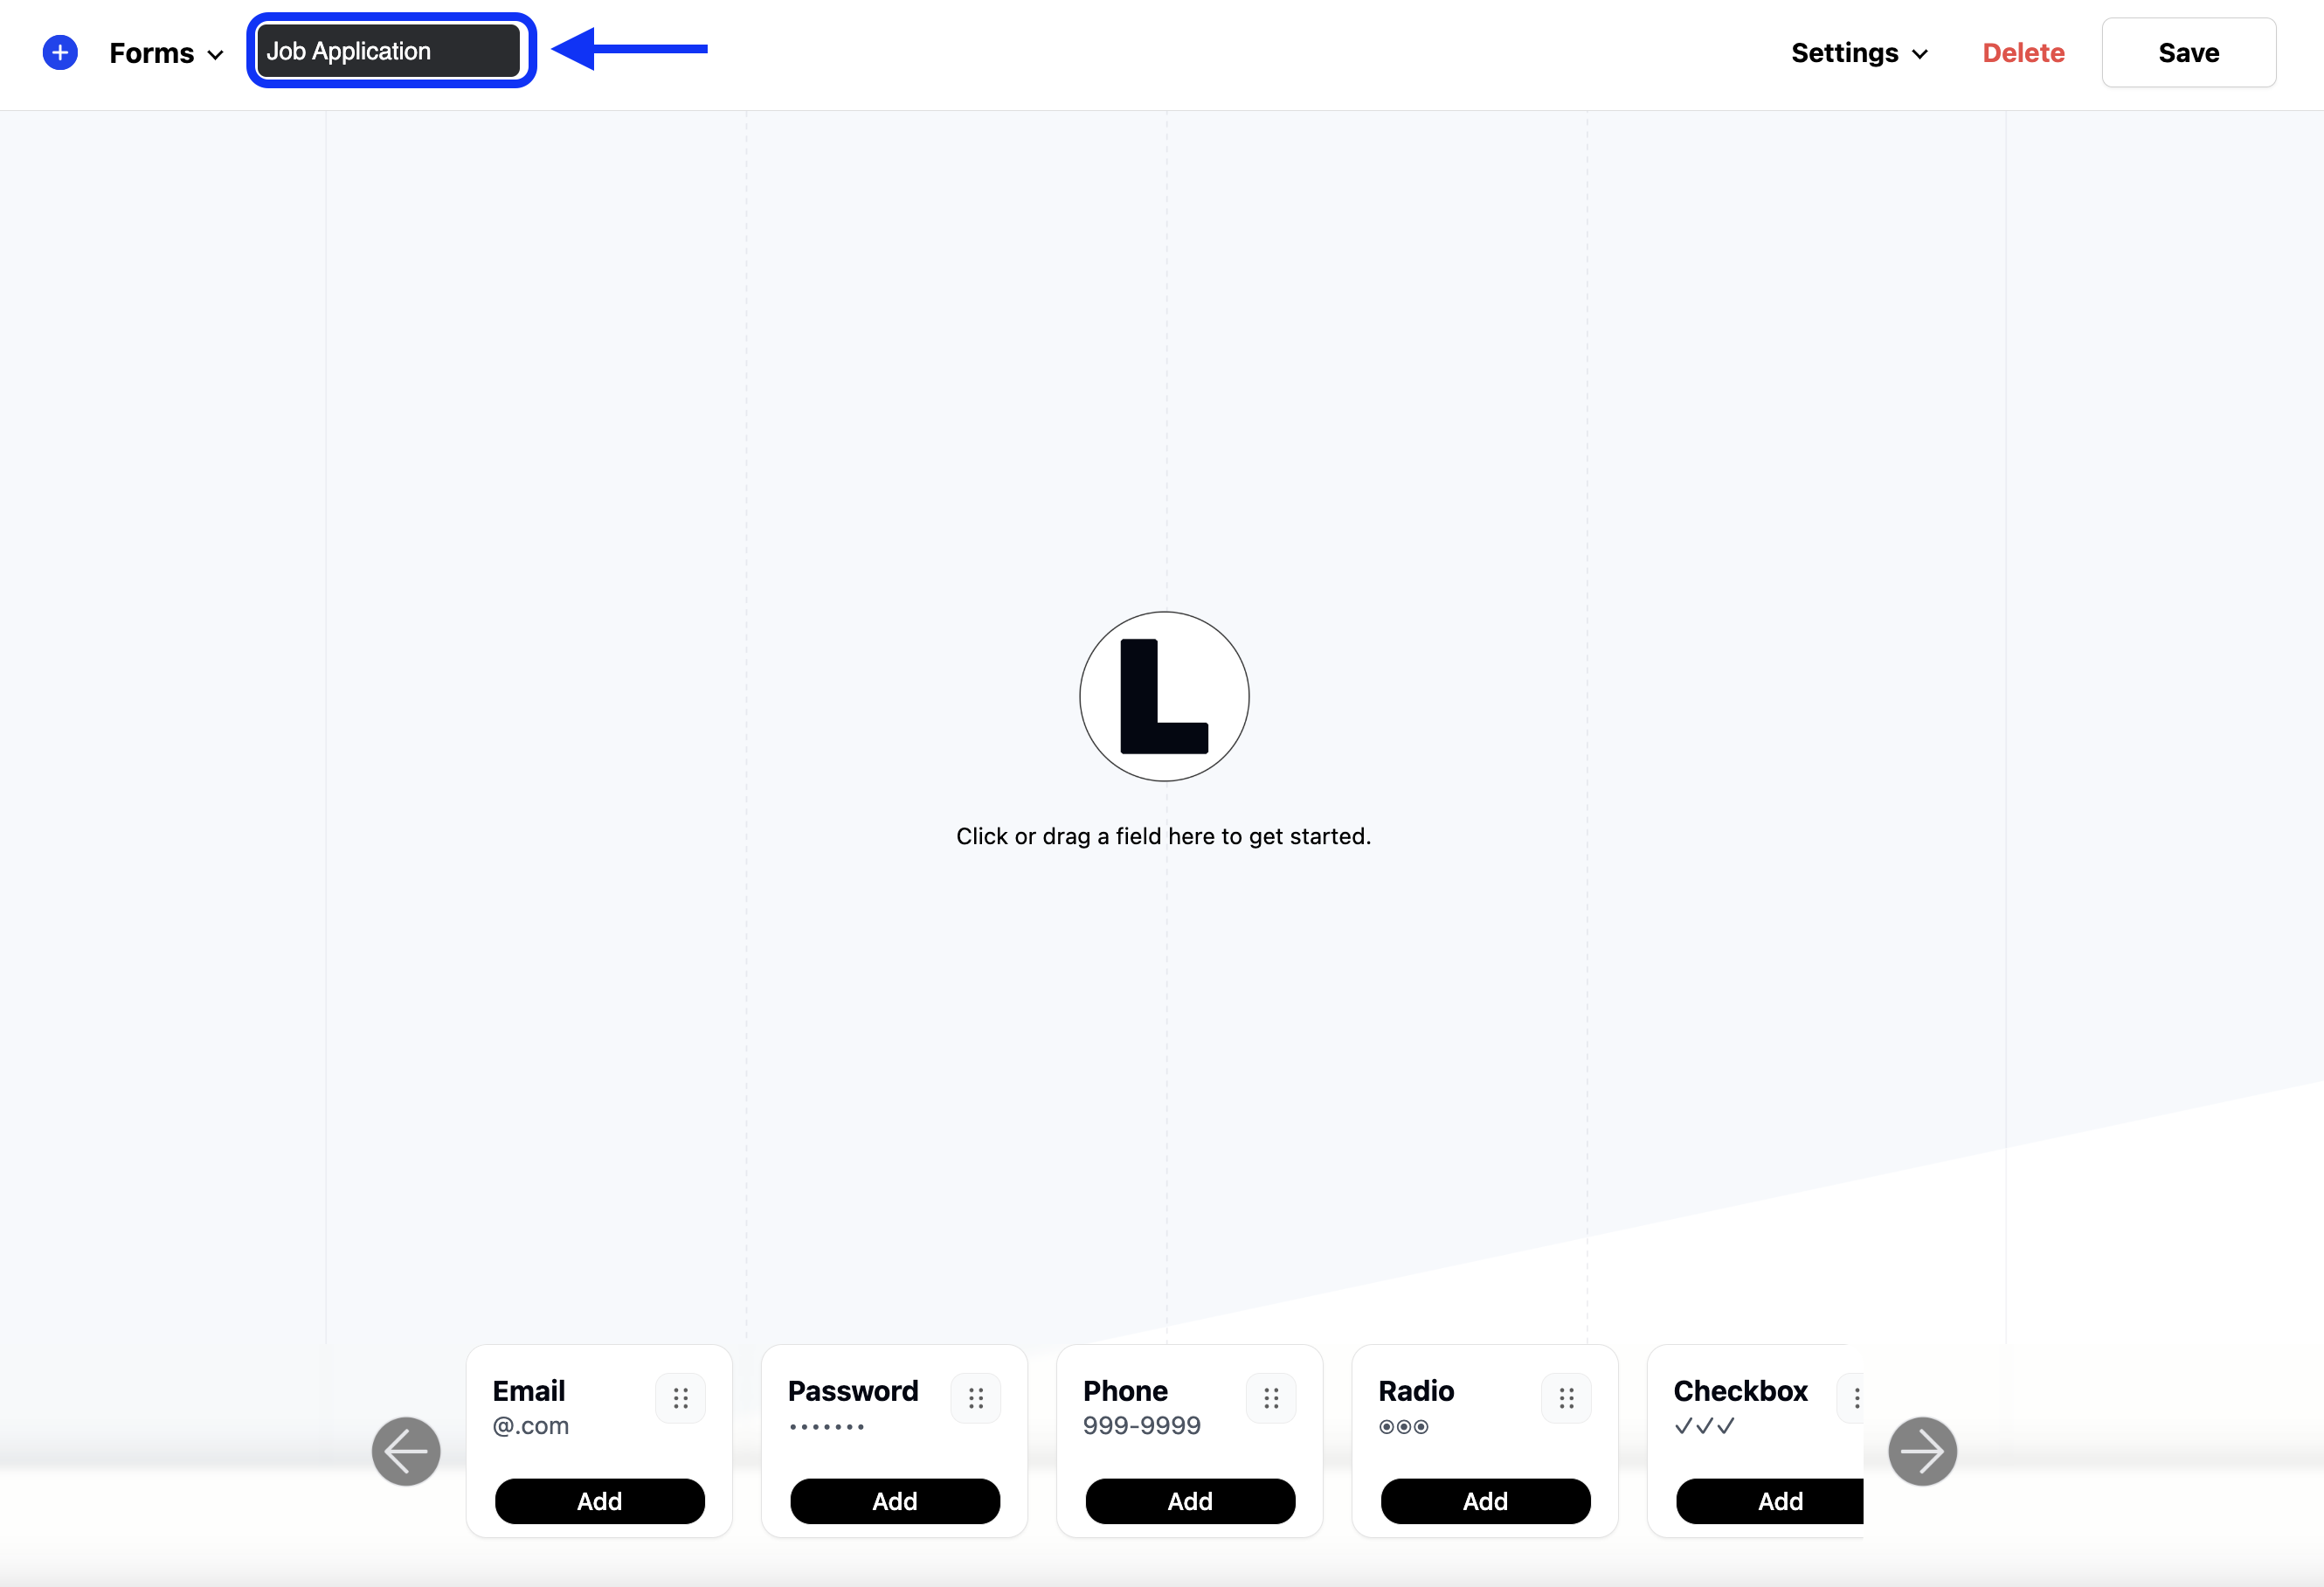
- 1. Add a Title: Start by adding a clear title to your form, such as "Job Application." This title will help you easily identify and reference the form in your form collection, avoiding any confusion with other forms you may be working on.
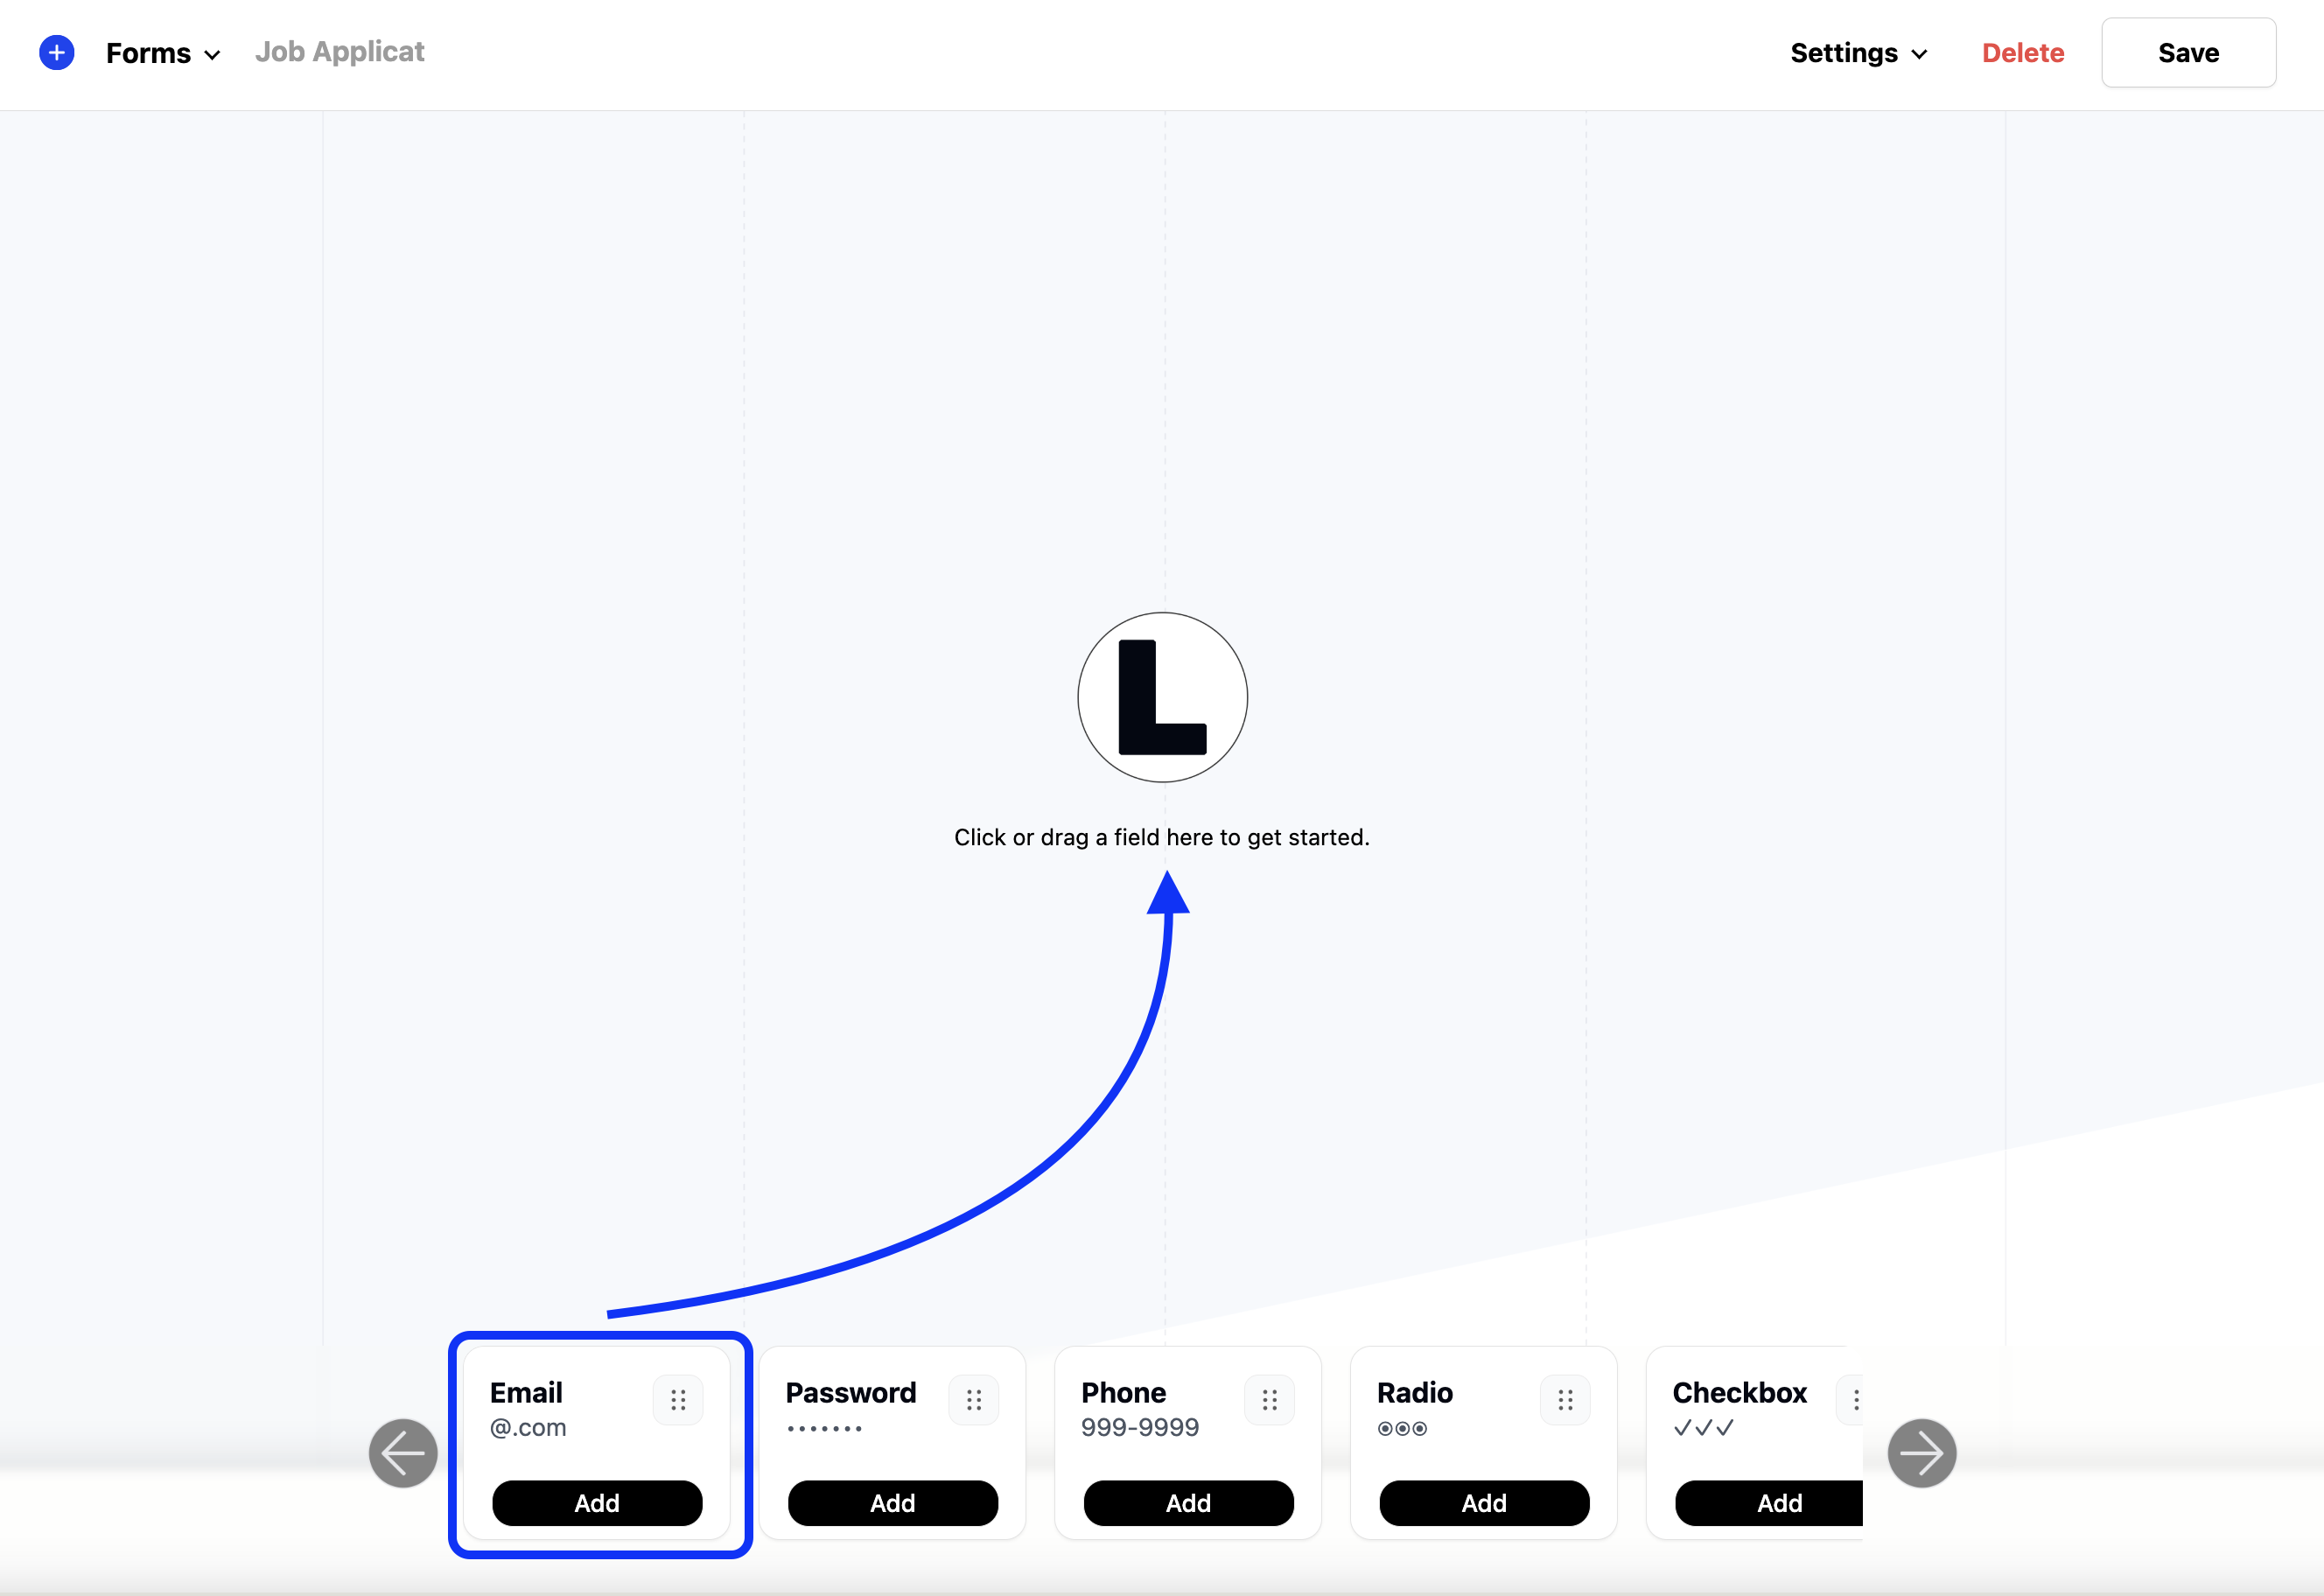
- 2. Adding Fields: Next, add the necessary fields to your job application form. The most efficient way to do this is by dragging and dropping fields into the form. You can click and hold the field you want to add, drag it to the dropzone area, and release the mouse click. Alternatively, you can also click on the field to add it directly.
Please note: If you want to speed up the process even more, consider using a pre-built job application template from the Likeable Forms templates library. Templates allow you to import a fully configured form in just a few seconds, making it easy to get started right away. You can preview and demo these templates to see how they work before importing them.
For our job application form, we’ll add a total of nine fields. Here’s a quick breakdown of each field we’ll need to add:
- 1. First and Last Name: Two text fields (side by side)
- 2. Email Address: One email address field
- 3. Phone Number: One phone number field
- 4. Position Applying For: A dropdown menu
- 5. Current Employer: A text field
- 6. Education: A checkbox field
- 7. Special Skills: A checkbox field
- 8. Resume Upload: A file upload field
- 9. Reference Upload: A file upload field
Field Labels and Descriptions
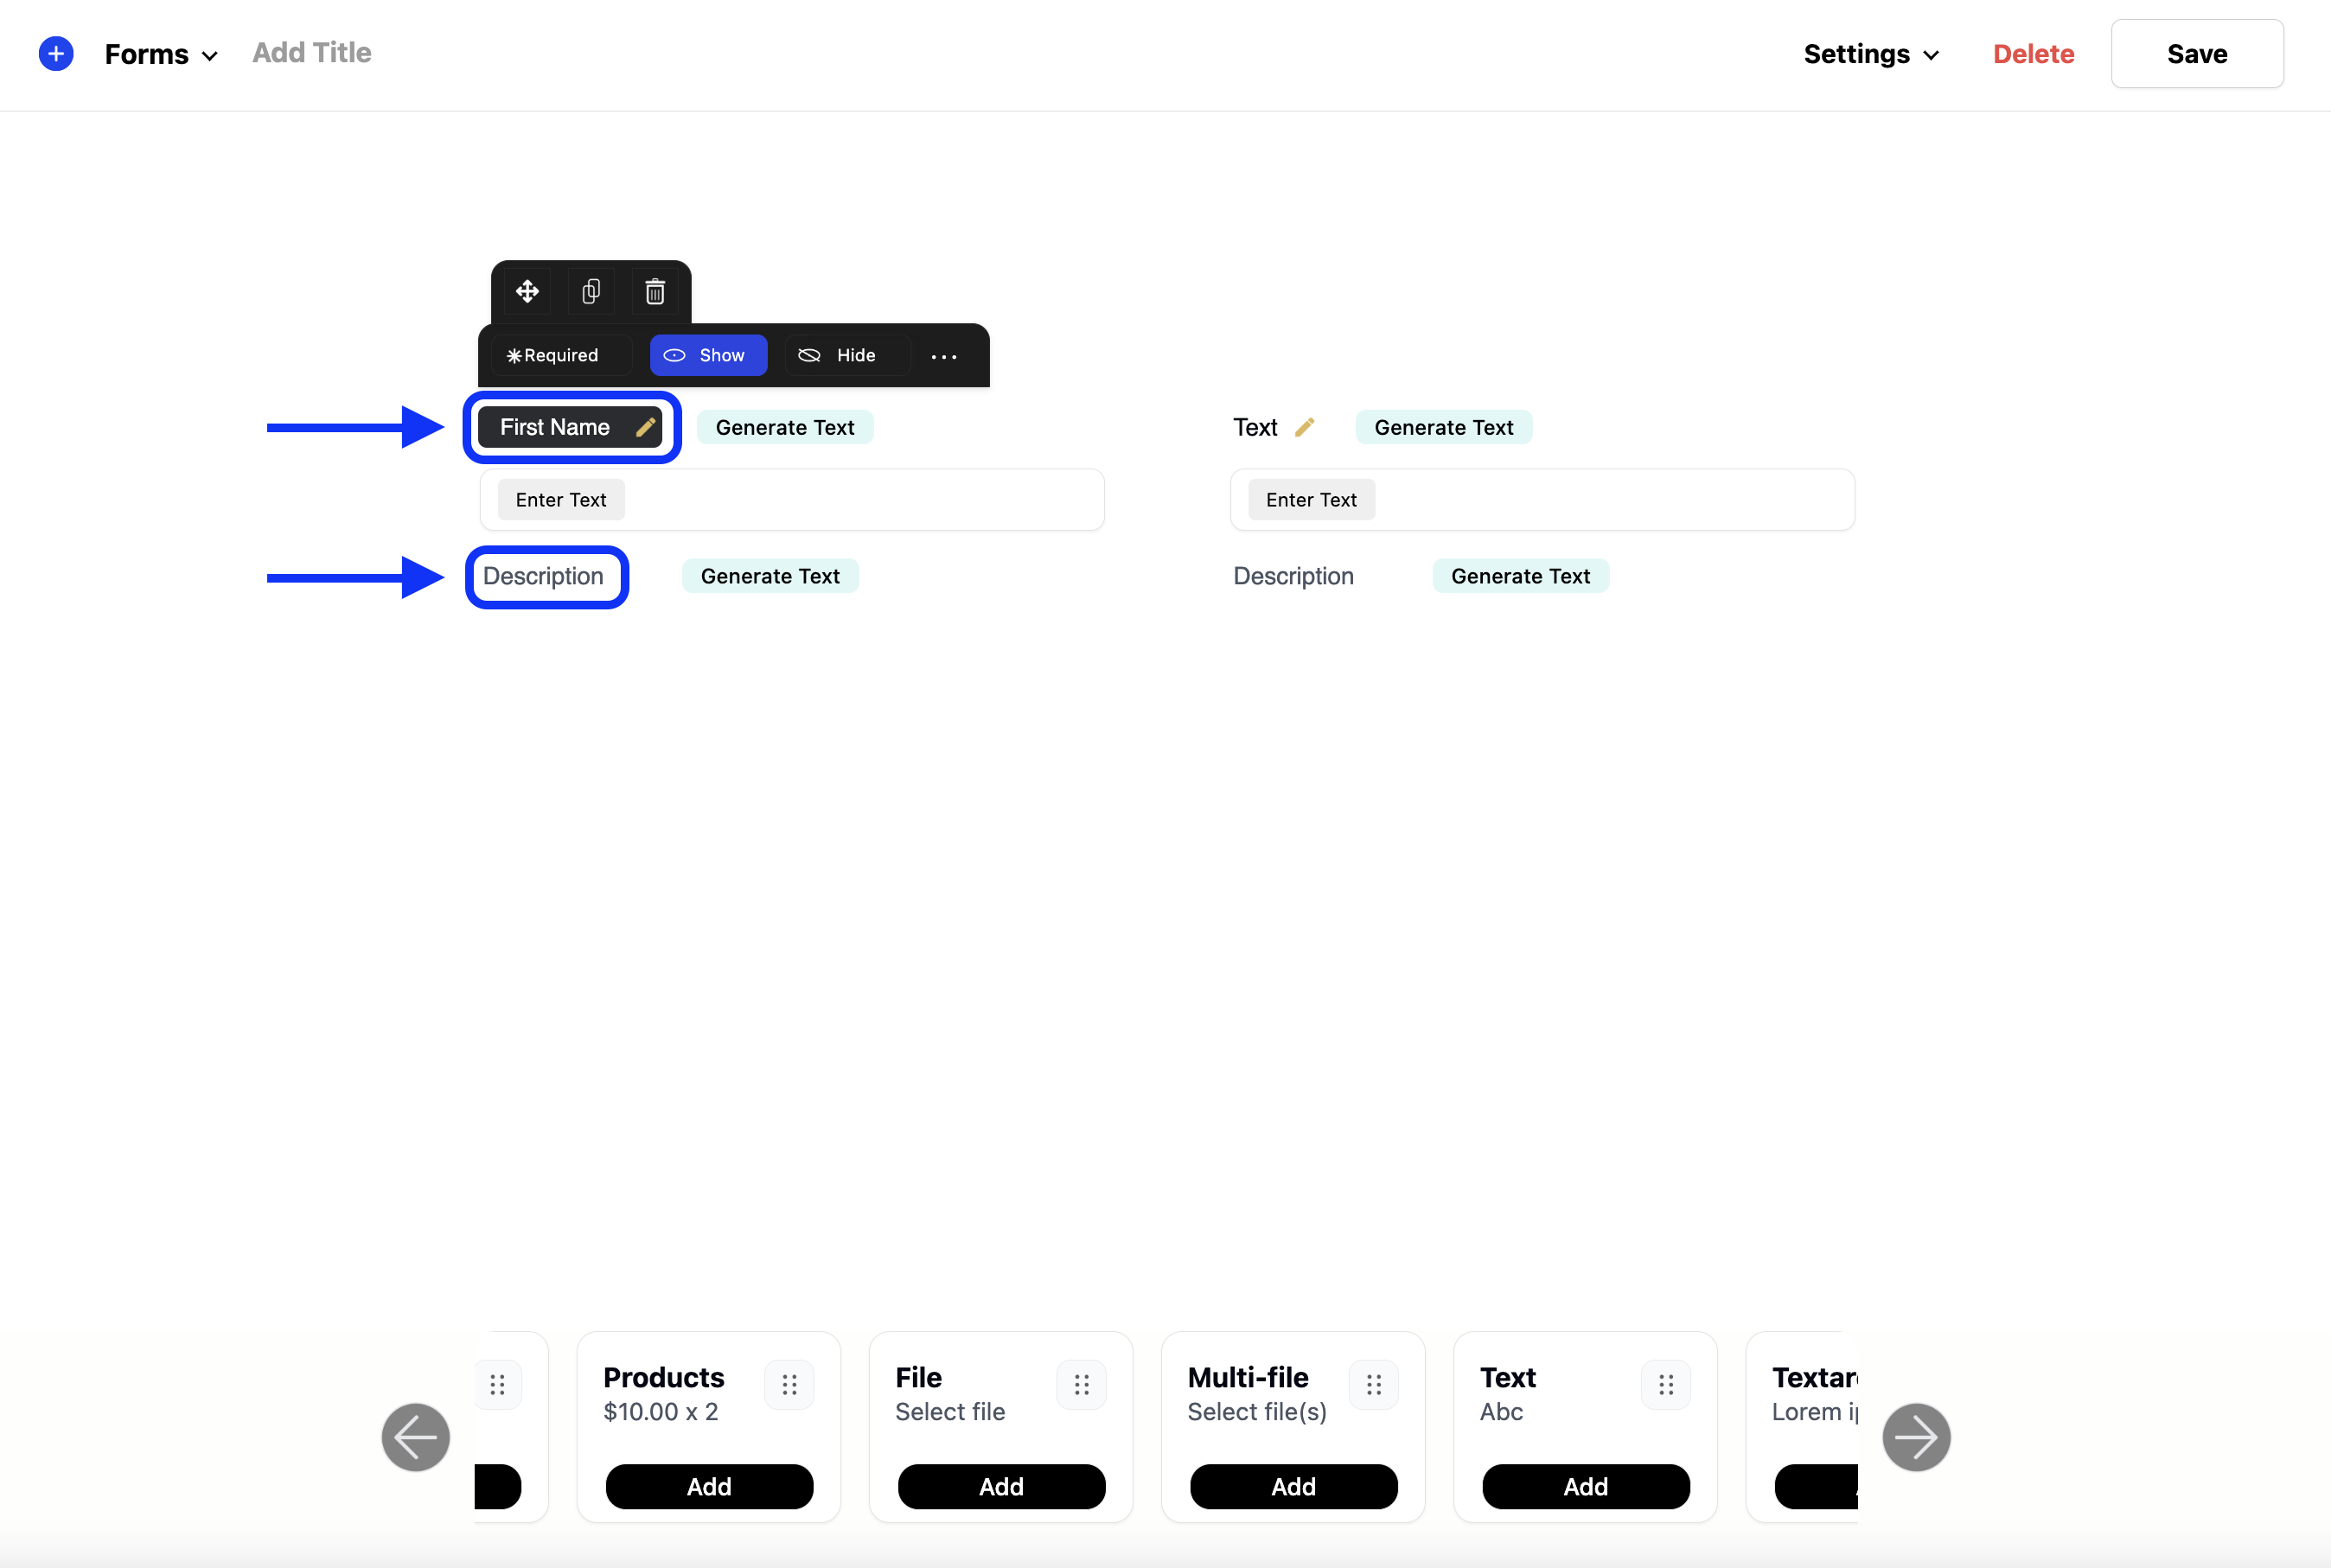
To create a user-friendly experience, you must include clear and concise field labels and descriptions. These elements help guide the applicant through the process by explaining exactly what information is expected in each field.
For example, for the "Email Address" field, the label would be “Email Address,” and the description or helper text could read, "Please enter your email address," or "Must include @domain.com." These small details can go a long way toward preventing confusion and ensuring that the applicant submits their information correctly.
Please note: In the form builder, you can easily edit field labels and descriptions by hovering over the text and clicking to make changes. This is referred to as inline editing.
Here’s a breakdown of the field labels and descriptions for each section of our form:
- First Name Label: First Name
- First Name Description: Please enter your first name.
- Last Name Label: Last Name
- Last Name Description: Please enter your last name.
- Email Address Label: Email Address
- Email Address Description: Please enter your email address.
- Phone Number Label: Phone
- Phone Number Description: Please enter your mobile number.
- Position Applying For Label: Position Applying For
- Position Applying For Description: Please select one position.
- Current Employer Label: Current Employer
- Current Employer Description: Please enter the company name.
- Education Label: Education
- Education Description: Please select all that apply.
- Special Skills Label: Special Skills
- Special Skills Description: Please select all that apply.
- Resume Upload Label: Please upload your resume.
- Reference Upload Label: Please upload your reference.
Setting Up Email Confirmations
As part of the user experience, it’s important to set up email confirmations to notify applicants that their application has been successfully submitted. To set up an email confirmation, hover over the Settings menu and select Notifications.
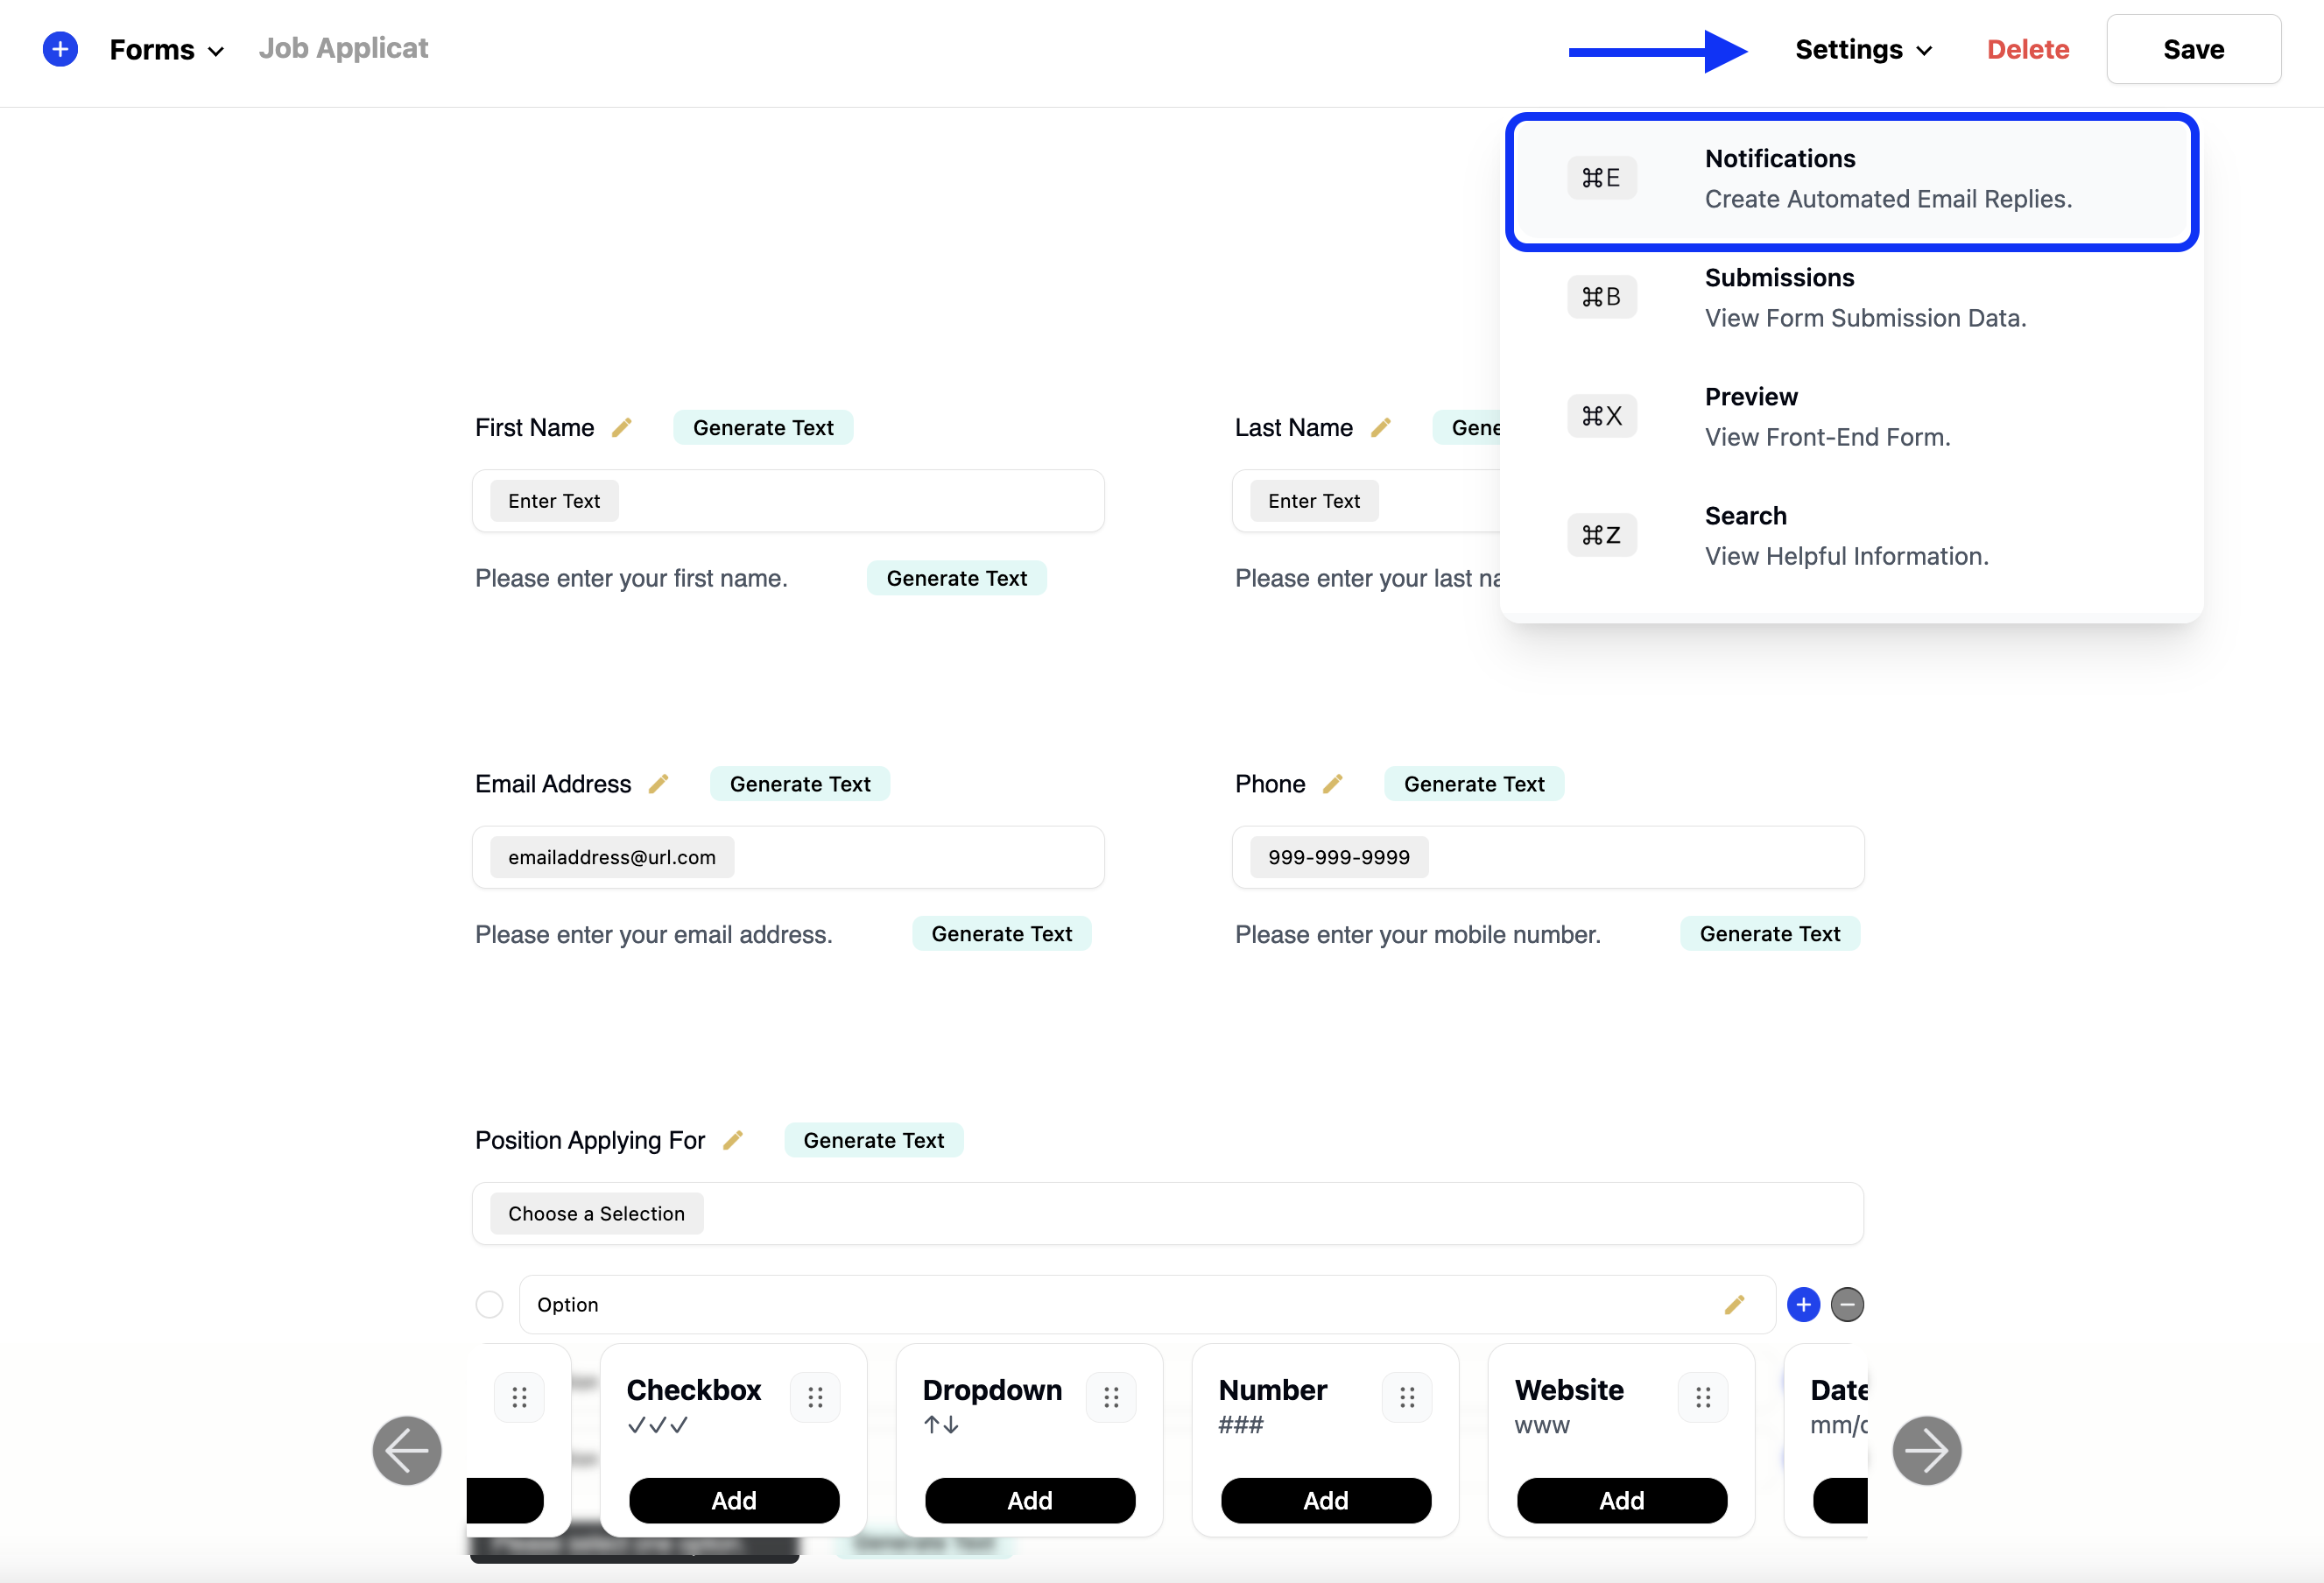
You’ll be able to add dynamic values from the form submission into the confirmation message. For example, you can include the applicant’s first name, position applied for, and current employer in the confirmation email. These dynamic values are added through “dynamic tags,” which are placeholders that pull in the information from the form submission.
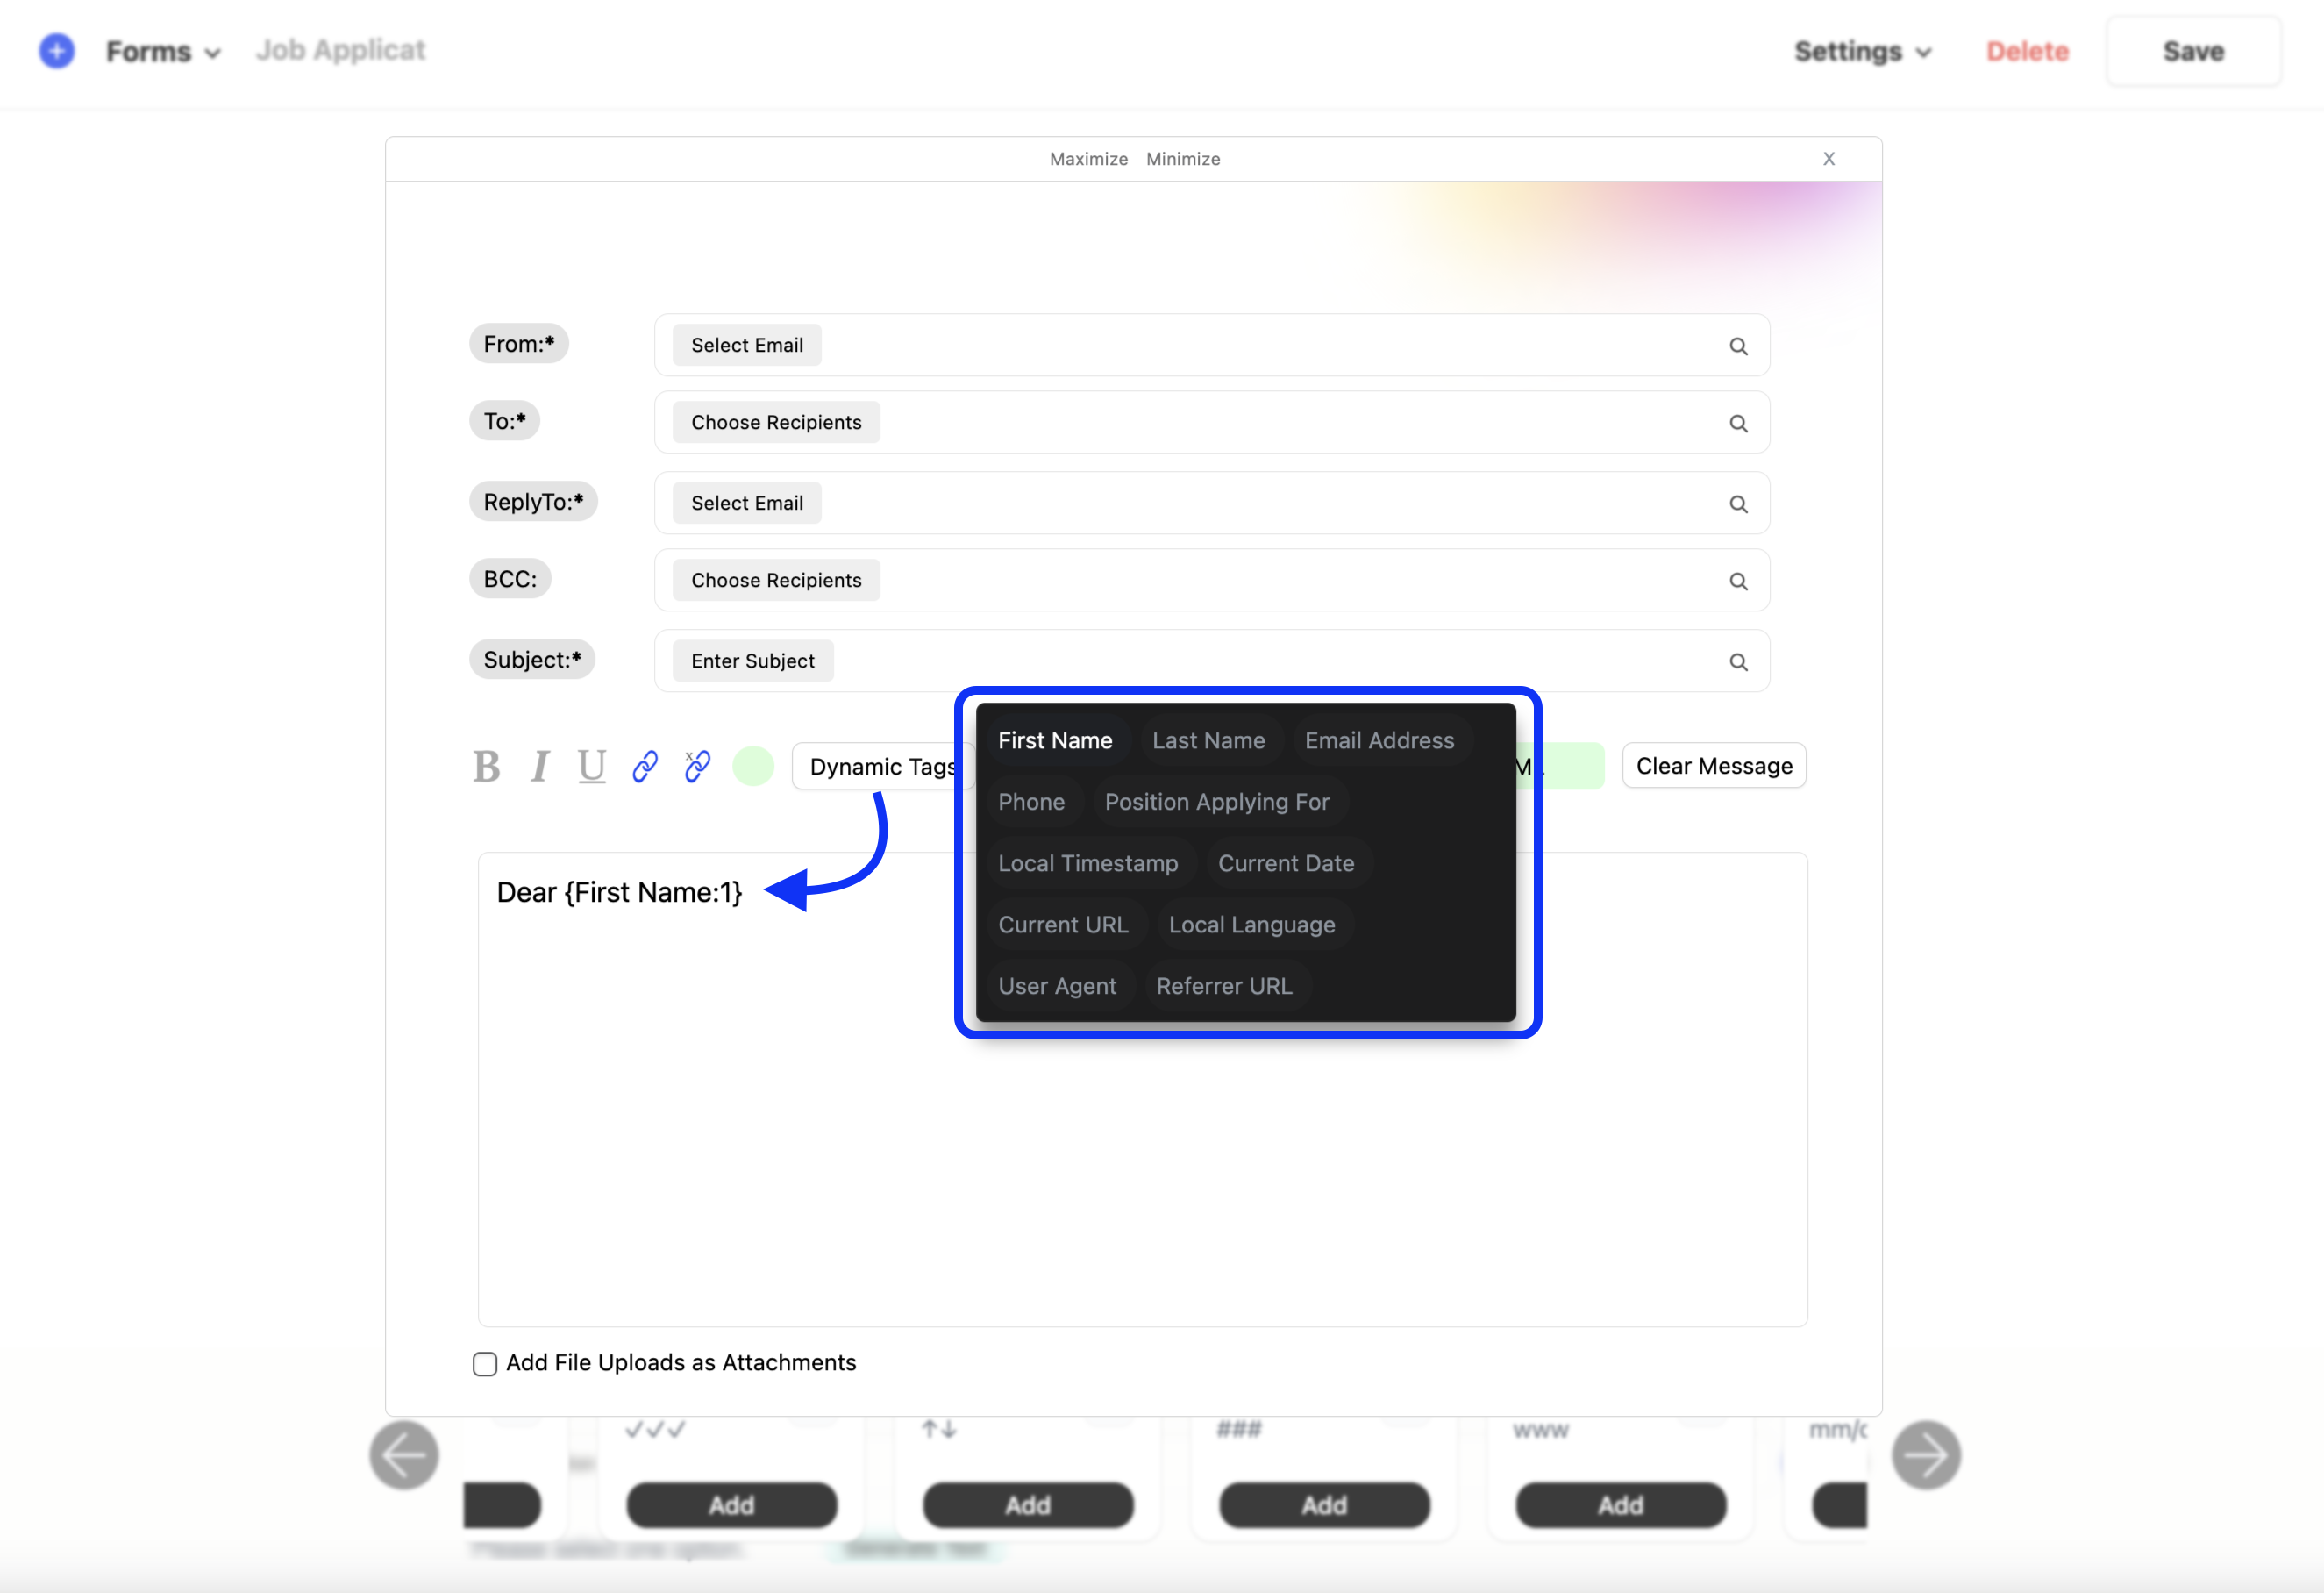
For example, you can start the confirmation with:
Dear {First Name},
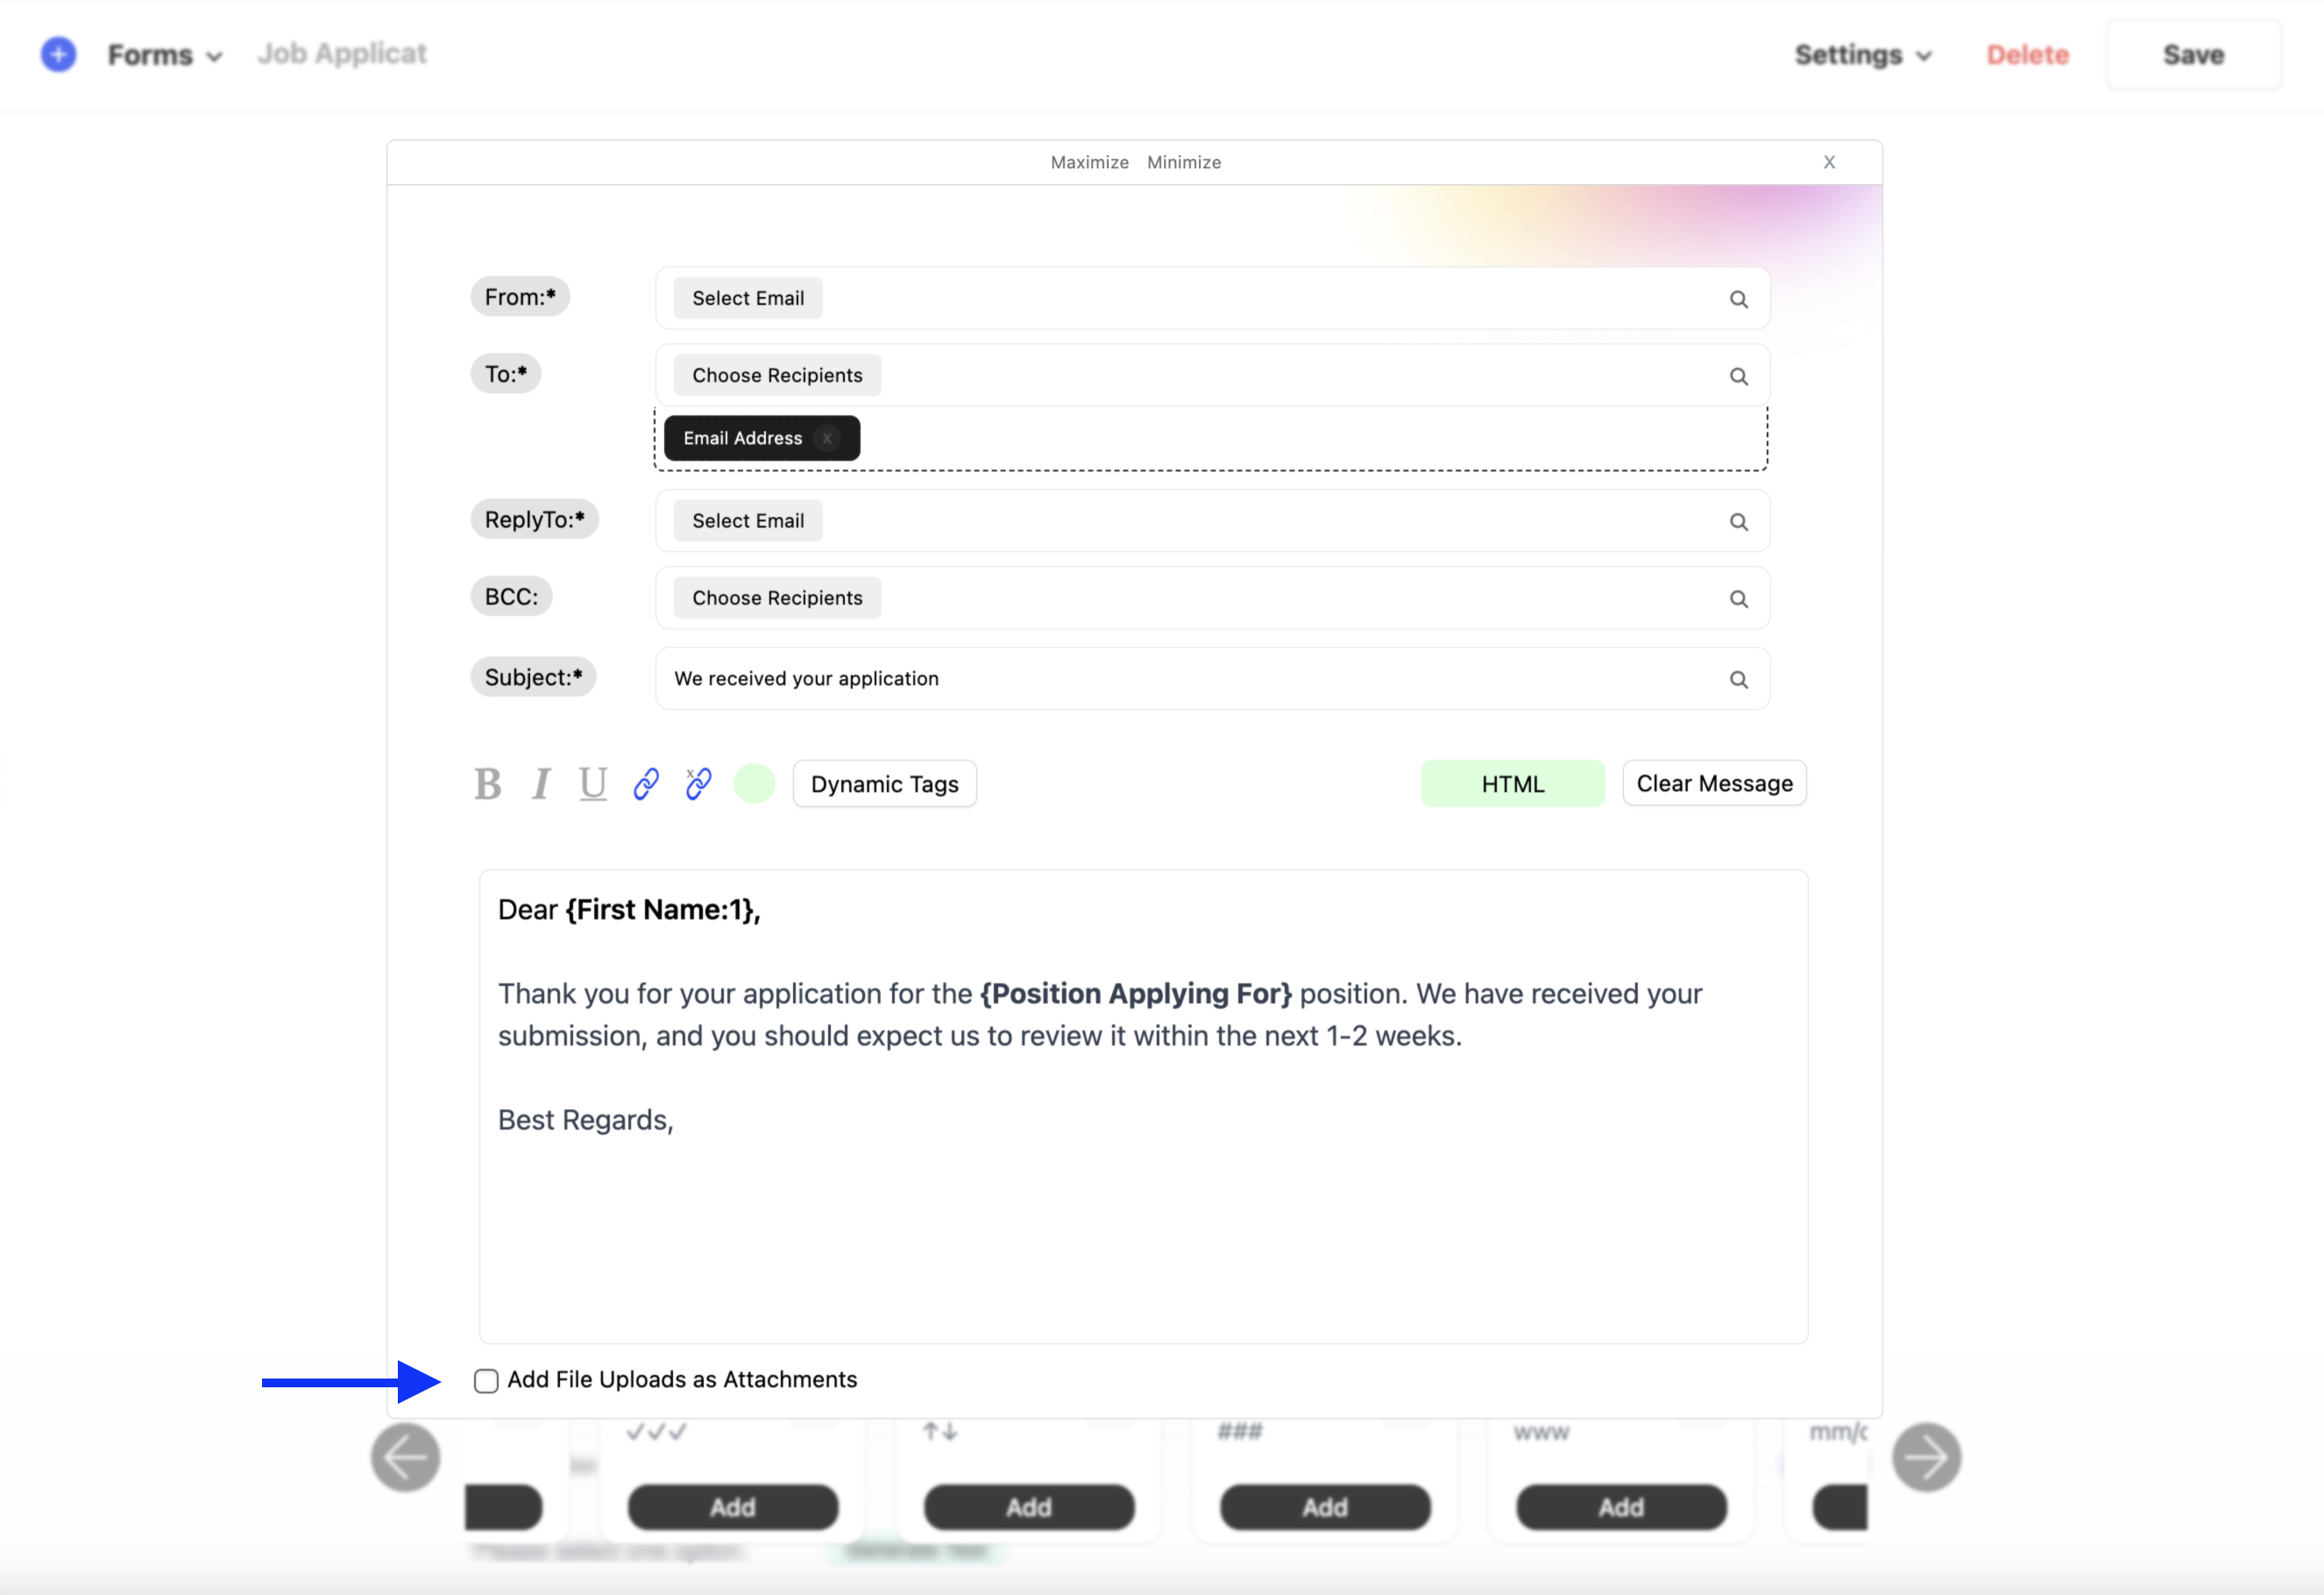
Thank you for your application for the {Position Applying For} position. We have received your submission, and you should expect us to review it within the next 1-2 weeks.
Additionally, you can include any uploaded files—such as the applicant’s resume or reference letters—by selecting the “Include file uploads as attachments” option in the settings.
Where to Add the Job Application Form on Your Website
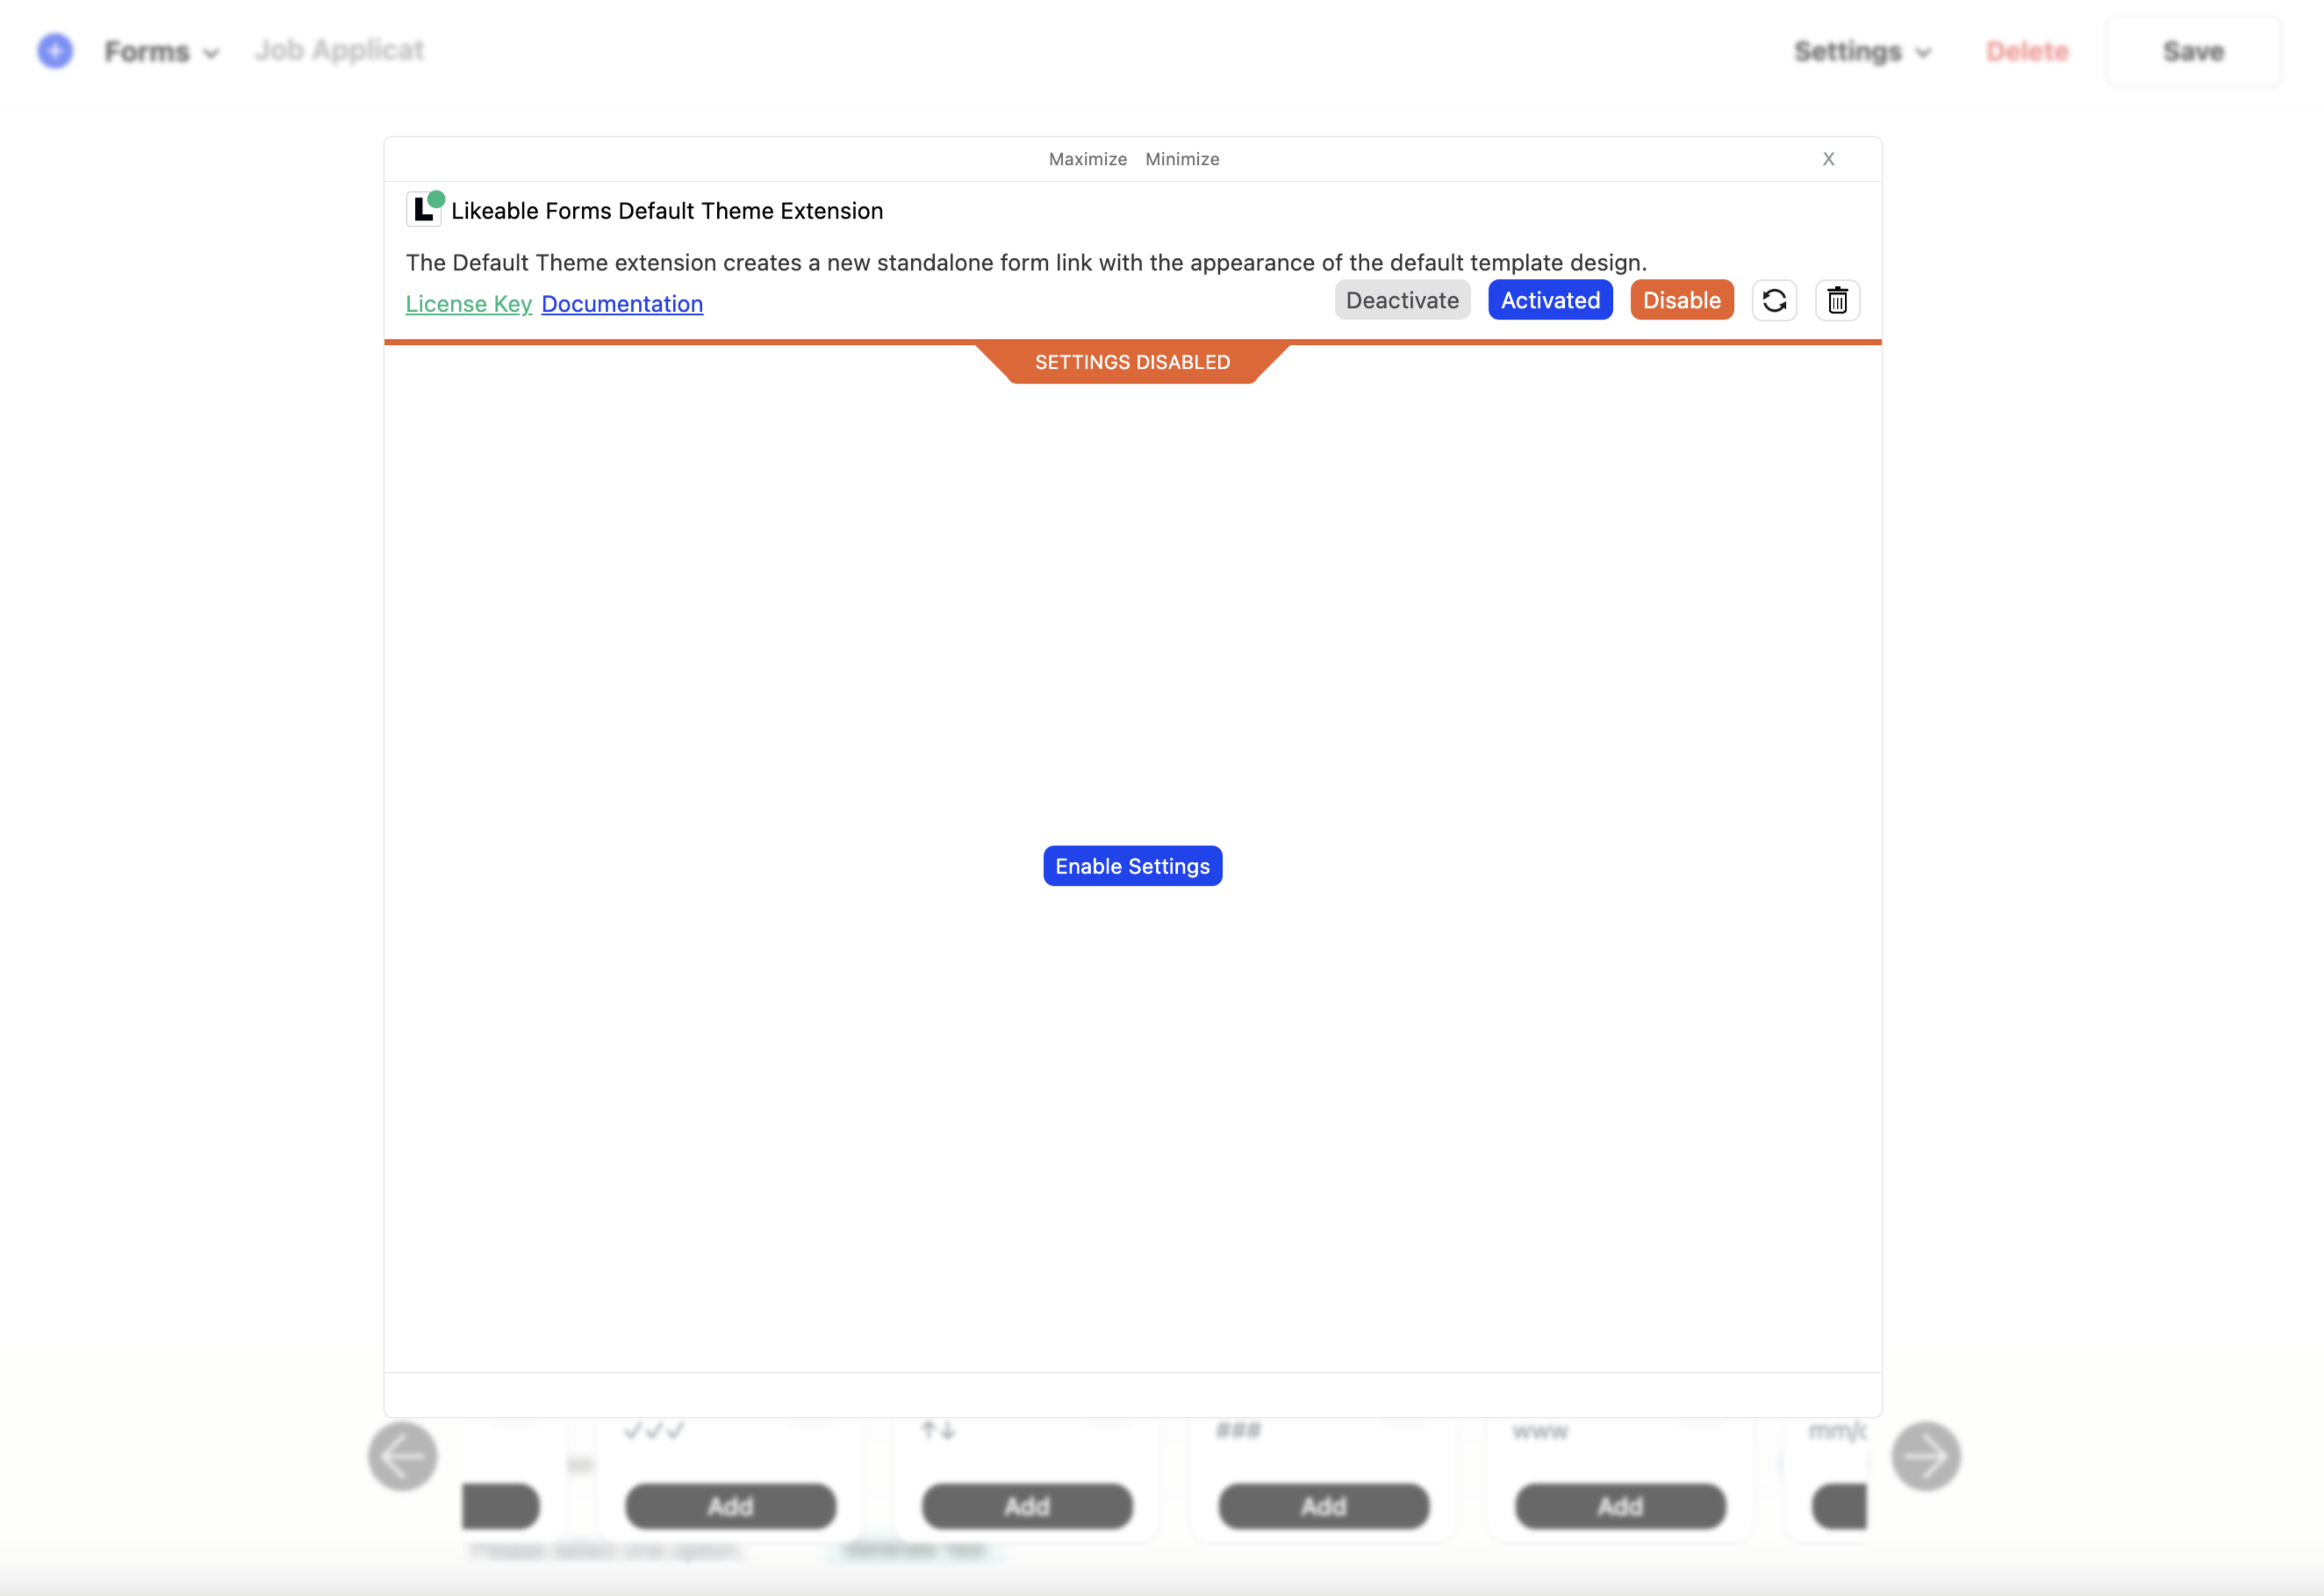
Once your form is complete, it’s time to embed it on your website. When publishing your form, it’s important to keep the webpage simple and distraction-free to maximize form submissions. We recommend using the default theme layout for your job application page. This layout automatically creates a clean, standalone webpage that showcases your job application form without any distractions.
To enable the default theme layout, hover over the Settings menu and select Landing Page from the dropdown. This will open a modal where you can choose the “Default Theme” option. After selecting this, click “Enable Settings” to activate the layout.
Final Steps: Save and Test Your Form
After completing the setup, don’t forget to to publish and save your job application form by clicking the "Save" button located at the top right of the window.
We strongly recommend running a quick test submission to ensure everything is working as expected and that email confirmations are sent correctly.