Monday, Nov 18, 2024
Building advance WordPress forms with automation
Forms
How to
Workflows
Automation

In today’s article, we’re going to cover how to build advance WordPress forms with the Likeable Forms form builder including reviewing submissions, sending automatic email notifications, generating personalized responses with the help of AI or artificial intelligence, and automatically create a new contact and ticket inside a third party CRM company. By combining these features, you can build exceptionally powerful workflows with your WordPress forms.
Default notifications
One of the many benefits of using the Likeable Forms builder is the ability to create default notifications. Default notifications are emails that can be sent to multiple recipients and include the entire form submission. This is an excellent way to communicate your businesses' responsiveness with a prompt email notification. Additionally, it doubles as having an easy way to review form submissions and automatically notify your customers with a confirmation email.
The real power behind notifications is the ability to use dynamic values or data that's entered into your form and plug the data in to use for our notification. By using dynamic values, we can create an automated notification every time the form is submitted that changes and updates in real-time using the data the user provided when submitting the form.
Default notifications do not require an add-on, the notifications tab/modal comes included with the Likeable Forms plugin. For each new form you create, a new notification can be set up. To access the notifications tab from inside the form builder, hover over the settings menu item in the top right corner of your screen and then scroll down until you see the notification menu item. Alternatively, you can use the "command e" keyboard shortcut.
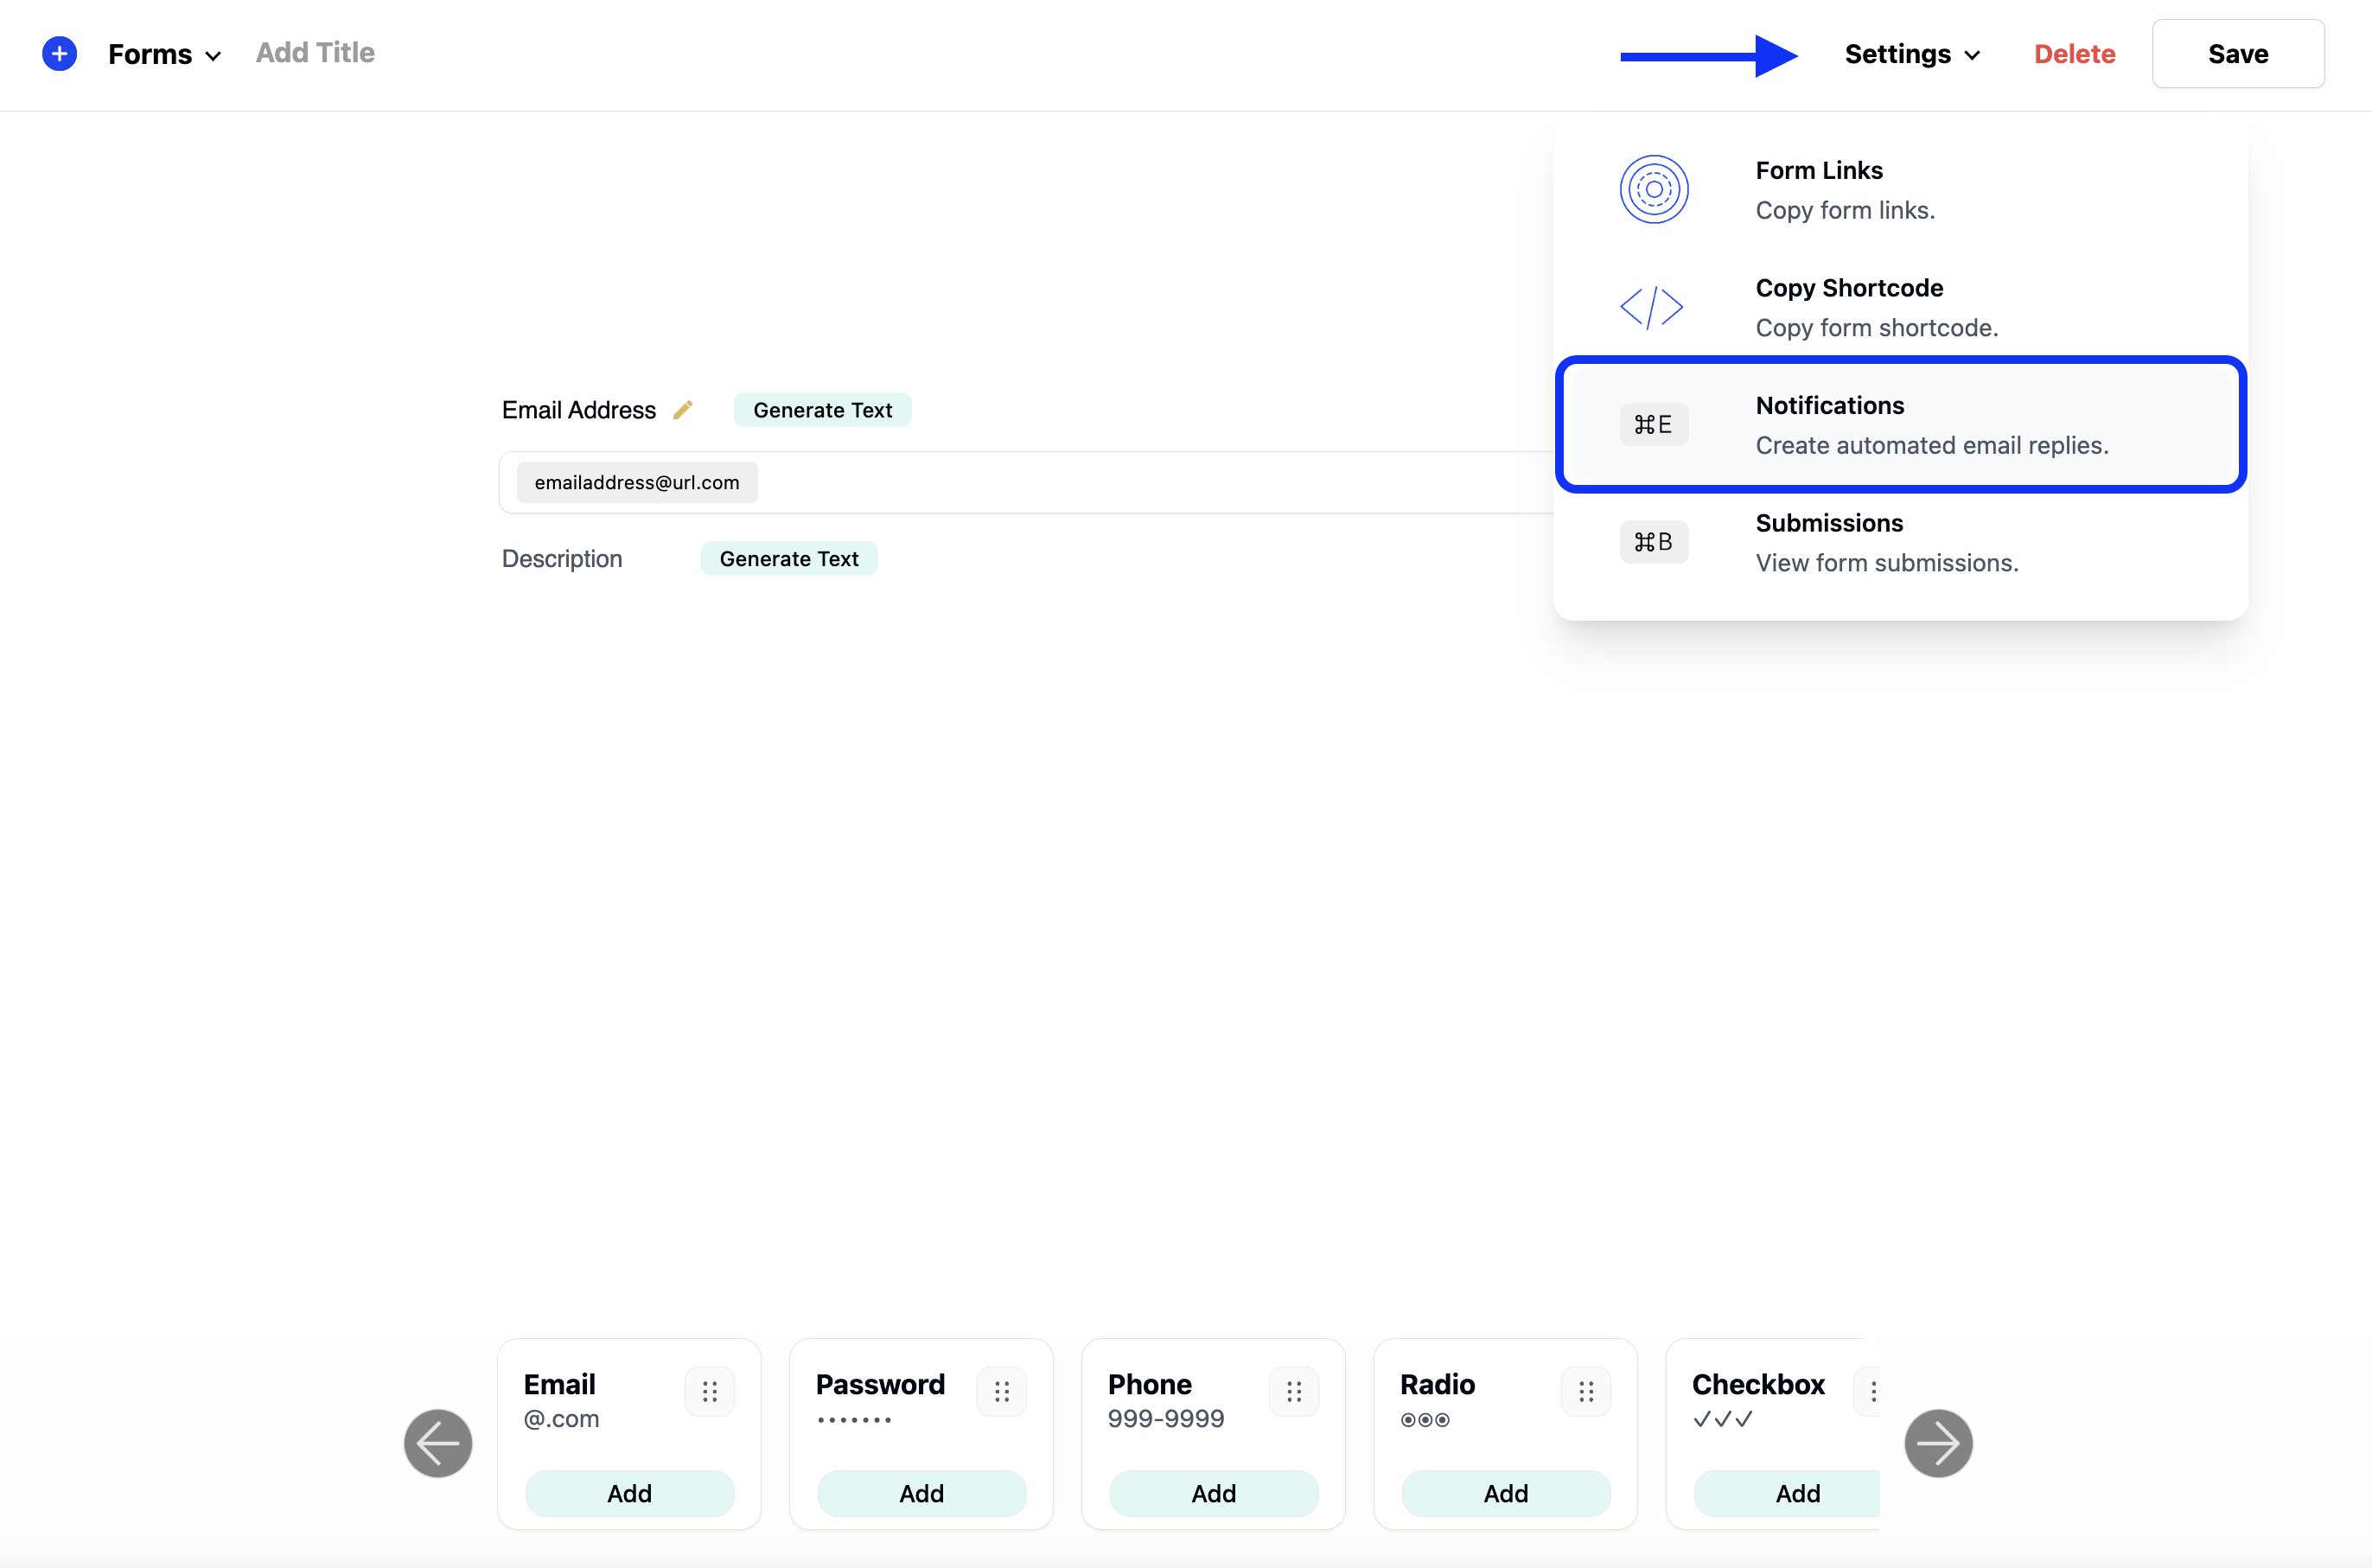
The notifications tab looks and feels similar to an email client and includes common features you would expect from a standard email client such as a from, to, bcc, subject, and a message/body area.
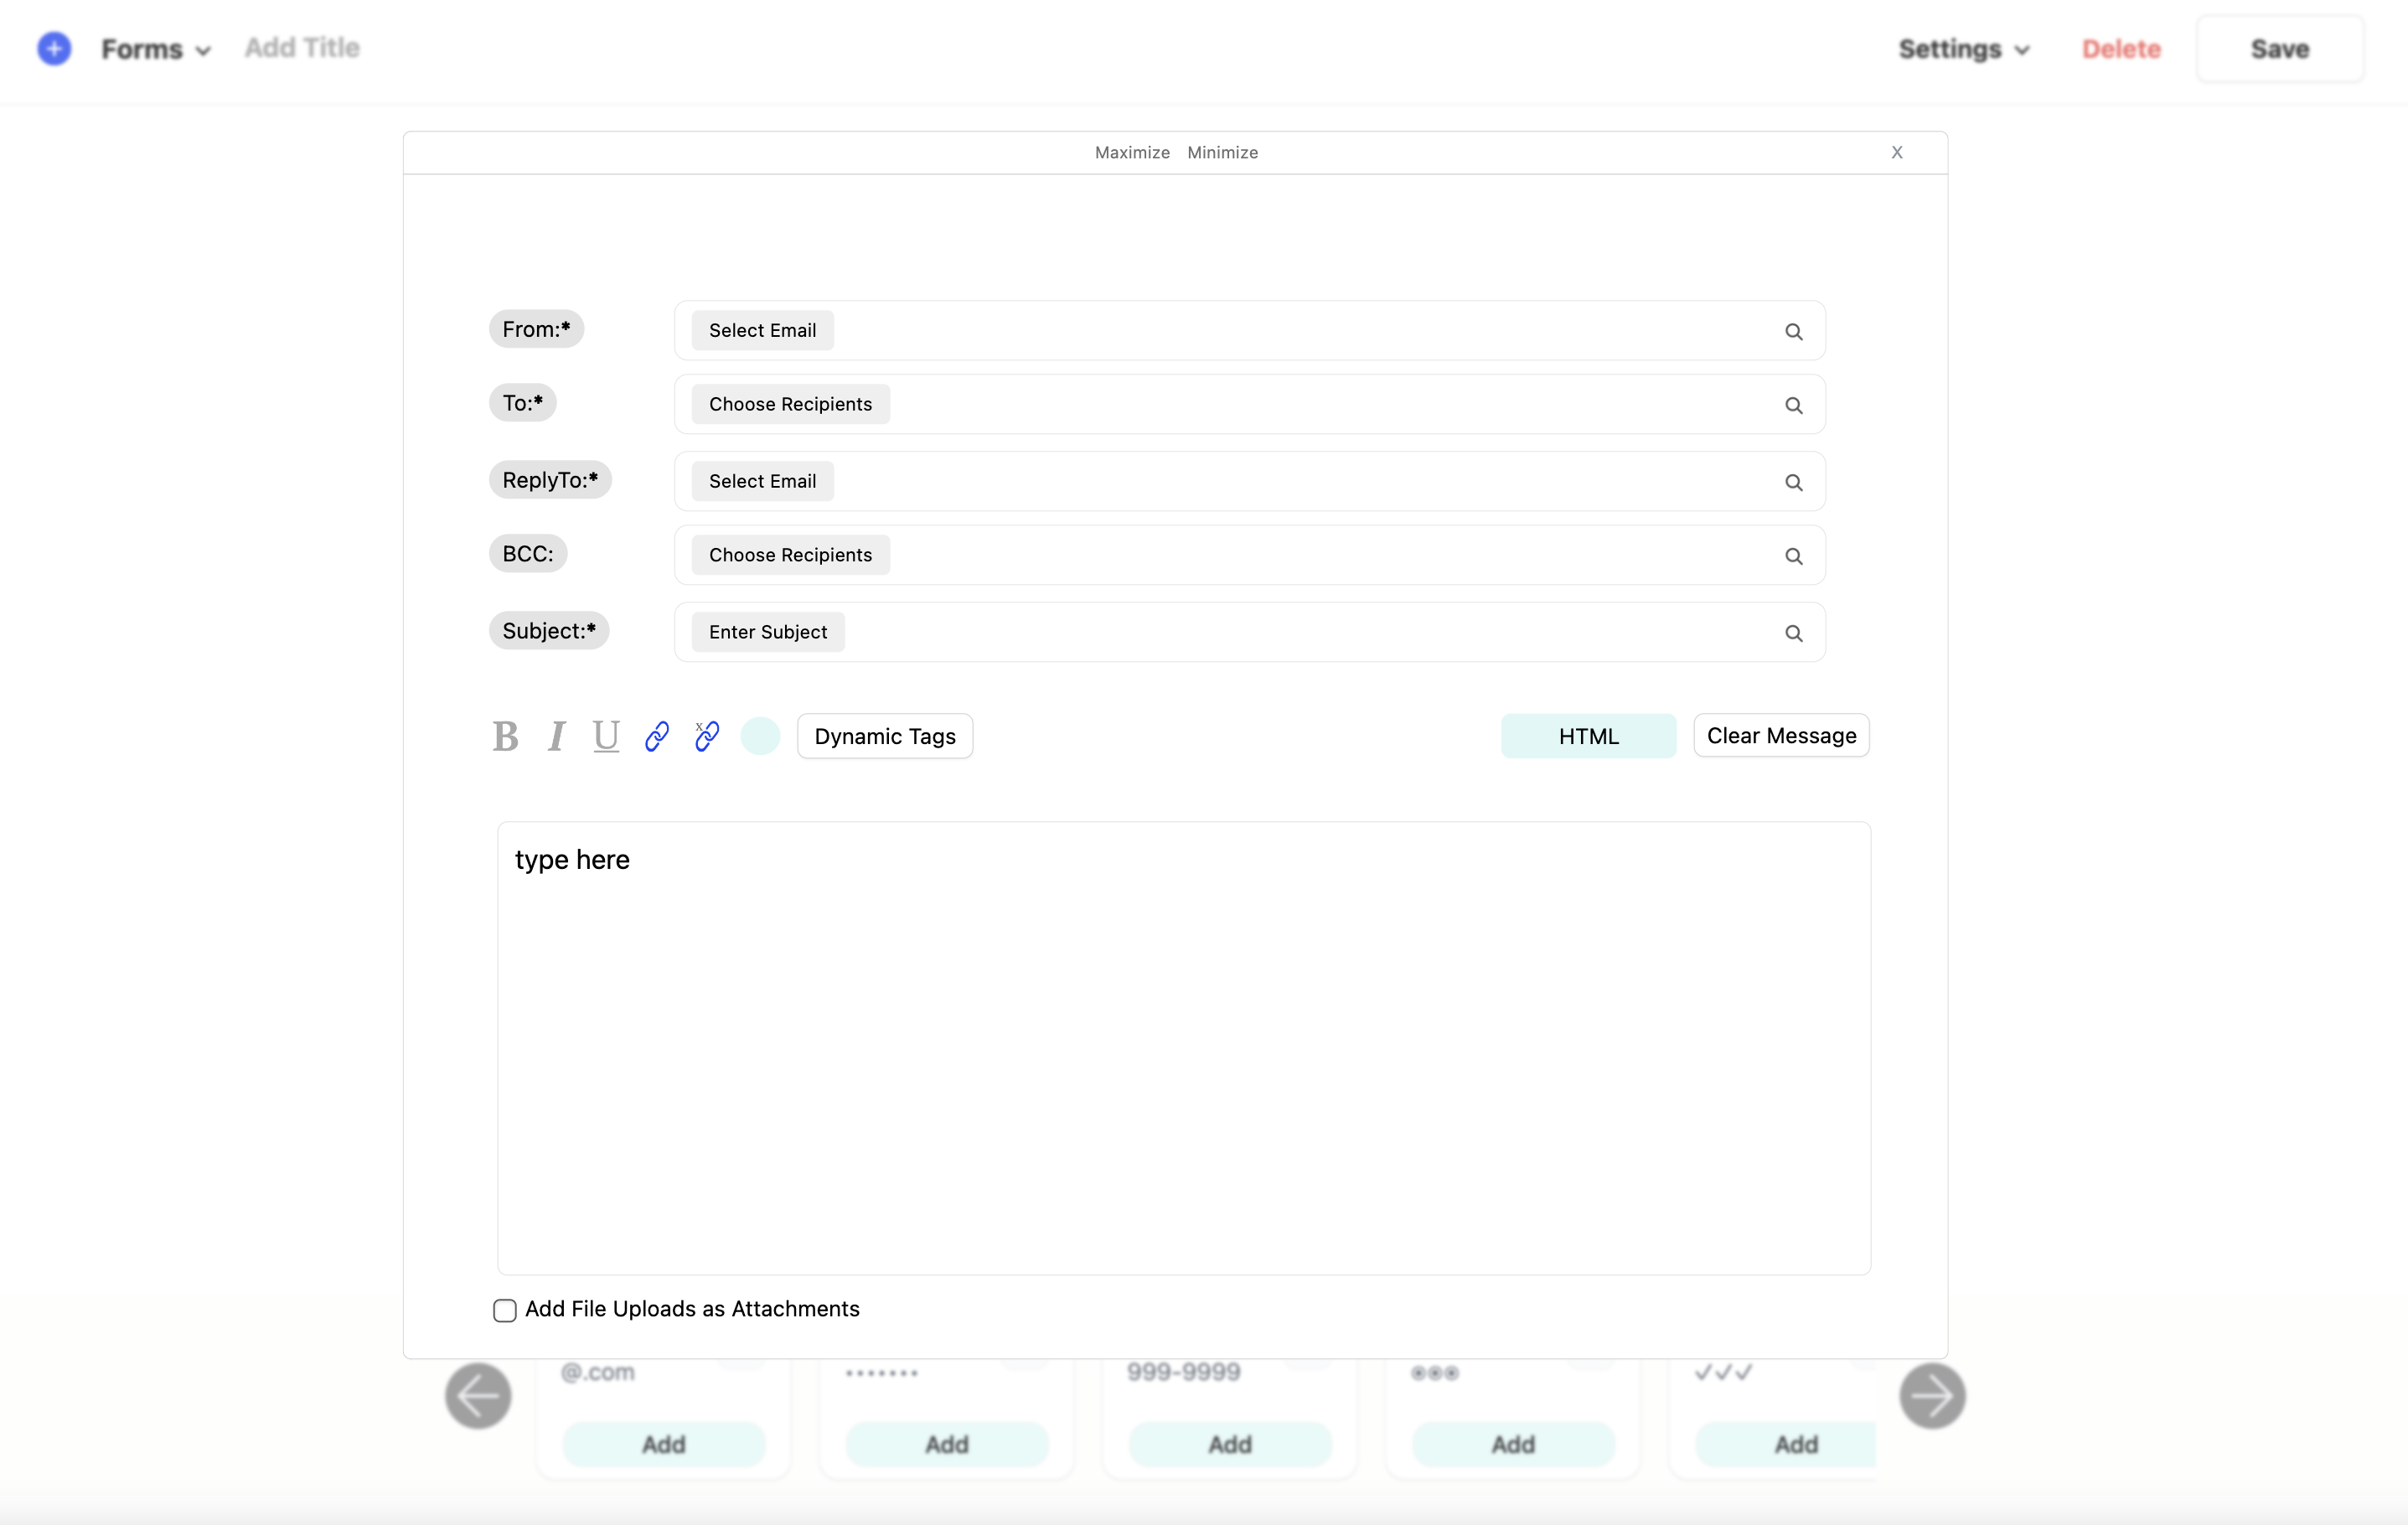
Likeable Forms automatically populates as much relevant information to make mapping accurate data as easy as possible. For example, when selecting the “from” field, all administrative emails registered with your WordPress website are pre-populated into the dropdown.
Additionally, the email address fields that have been adding to your form will also appear in various dropdowns as well. For example, when selecting the “to” field, you can see a full list of all email address input fields that exist in the current form. When selecting an email address field from the “to” field drop down, Likeable Forms will use the email address the user enters as the “to” email address for the notification.
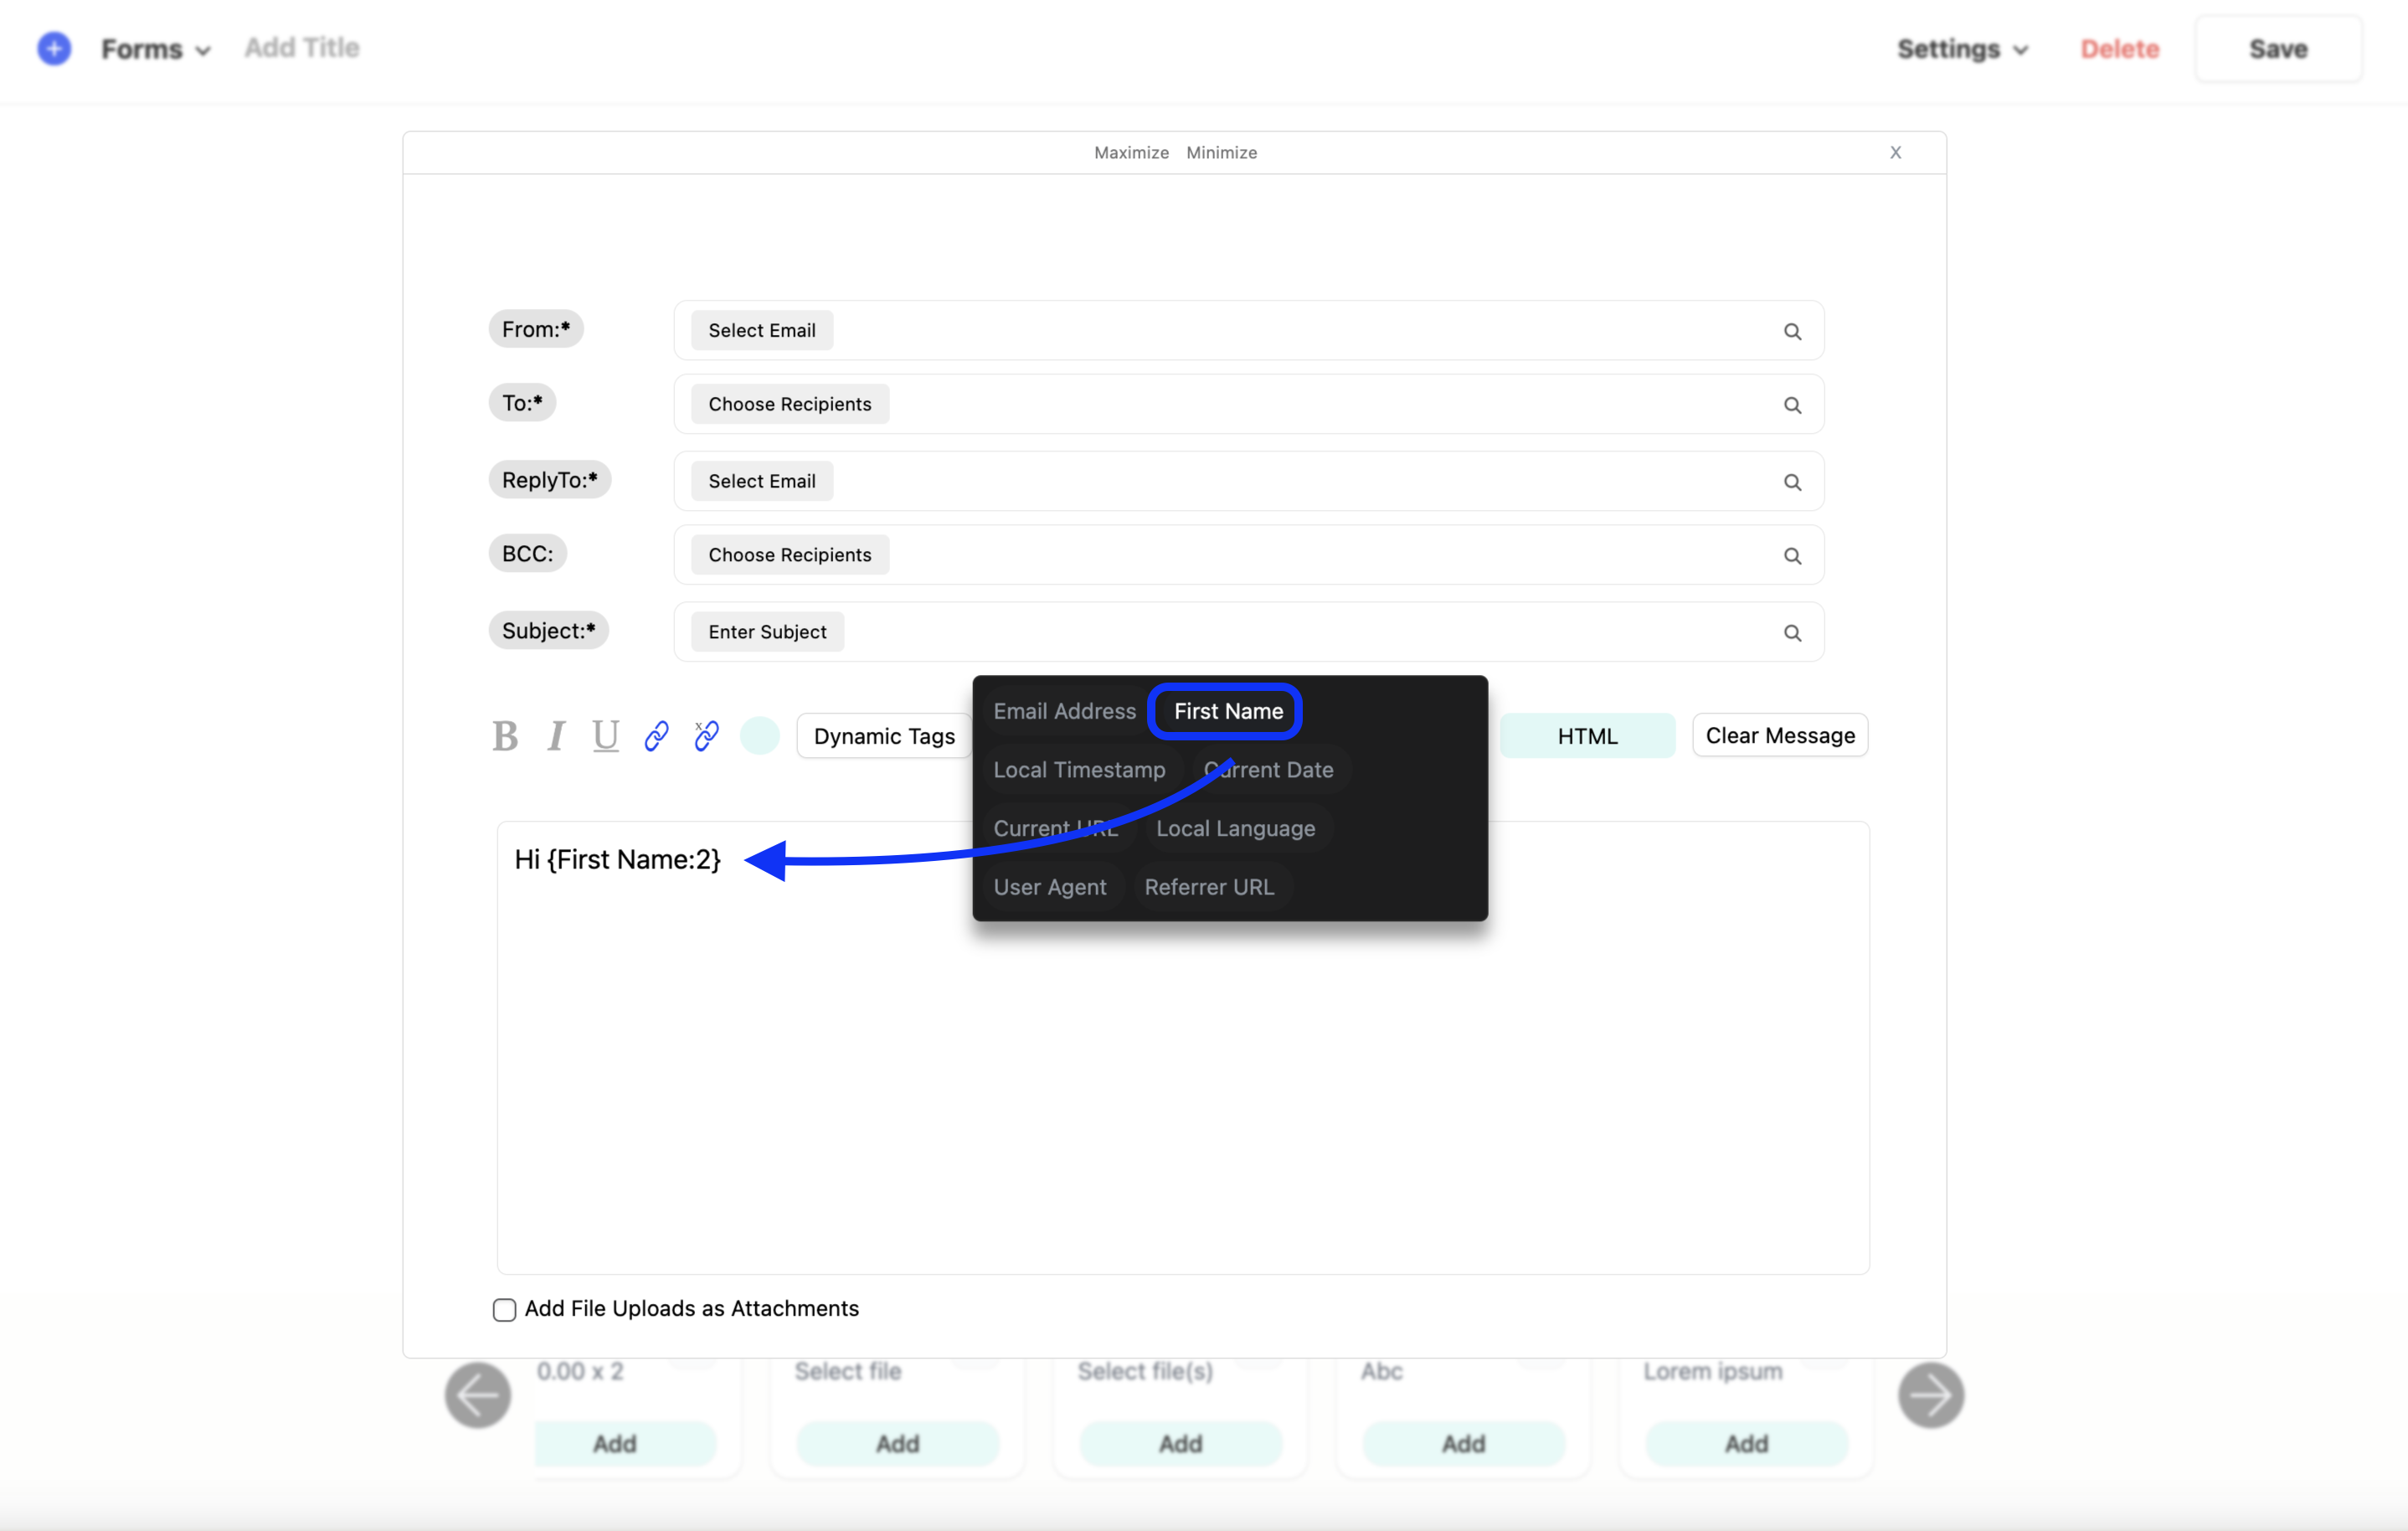
A standard email notification references a customer by first name and includes the entire form submission, followed by a timeline on when they should expect to hear back from you. By using dynamic tags, we can plug in the user's first name, by selecting the textarea, hovering over the dynamic tags button, and selecting the name option. Following suit, we can add the entire form submission values or the ones we want to include by continuing to add dynamic tags.
Reviewing submissions and sending responses
Having a centralized location for viewing and replying to submissions can help you respond to customer inquiries expediently and demonstrate your company's responsiveness. Likeable Forms automatically saves and stores all form submissions inside your WordPress database and displays the submissions inside the submissions tab or modal.
Likeable Forms also includes a built-in replies modal that’s accessible for each submission. A reply is not a notification. A default notification is an automatic response or confirmation. A reply is a personalized response that provides a solution with contextual understanding of their inquiry. By combining these two features, you can quickly review hundreds of submissions and send contextual responses to your customers.
To access your submissions, hover over the form title drop down on the left-hand side of your screen and then select the form's title. Form submissions are categorized by form.
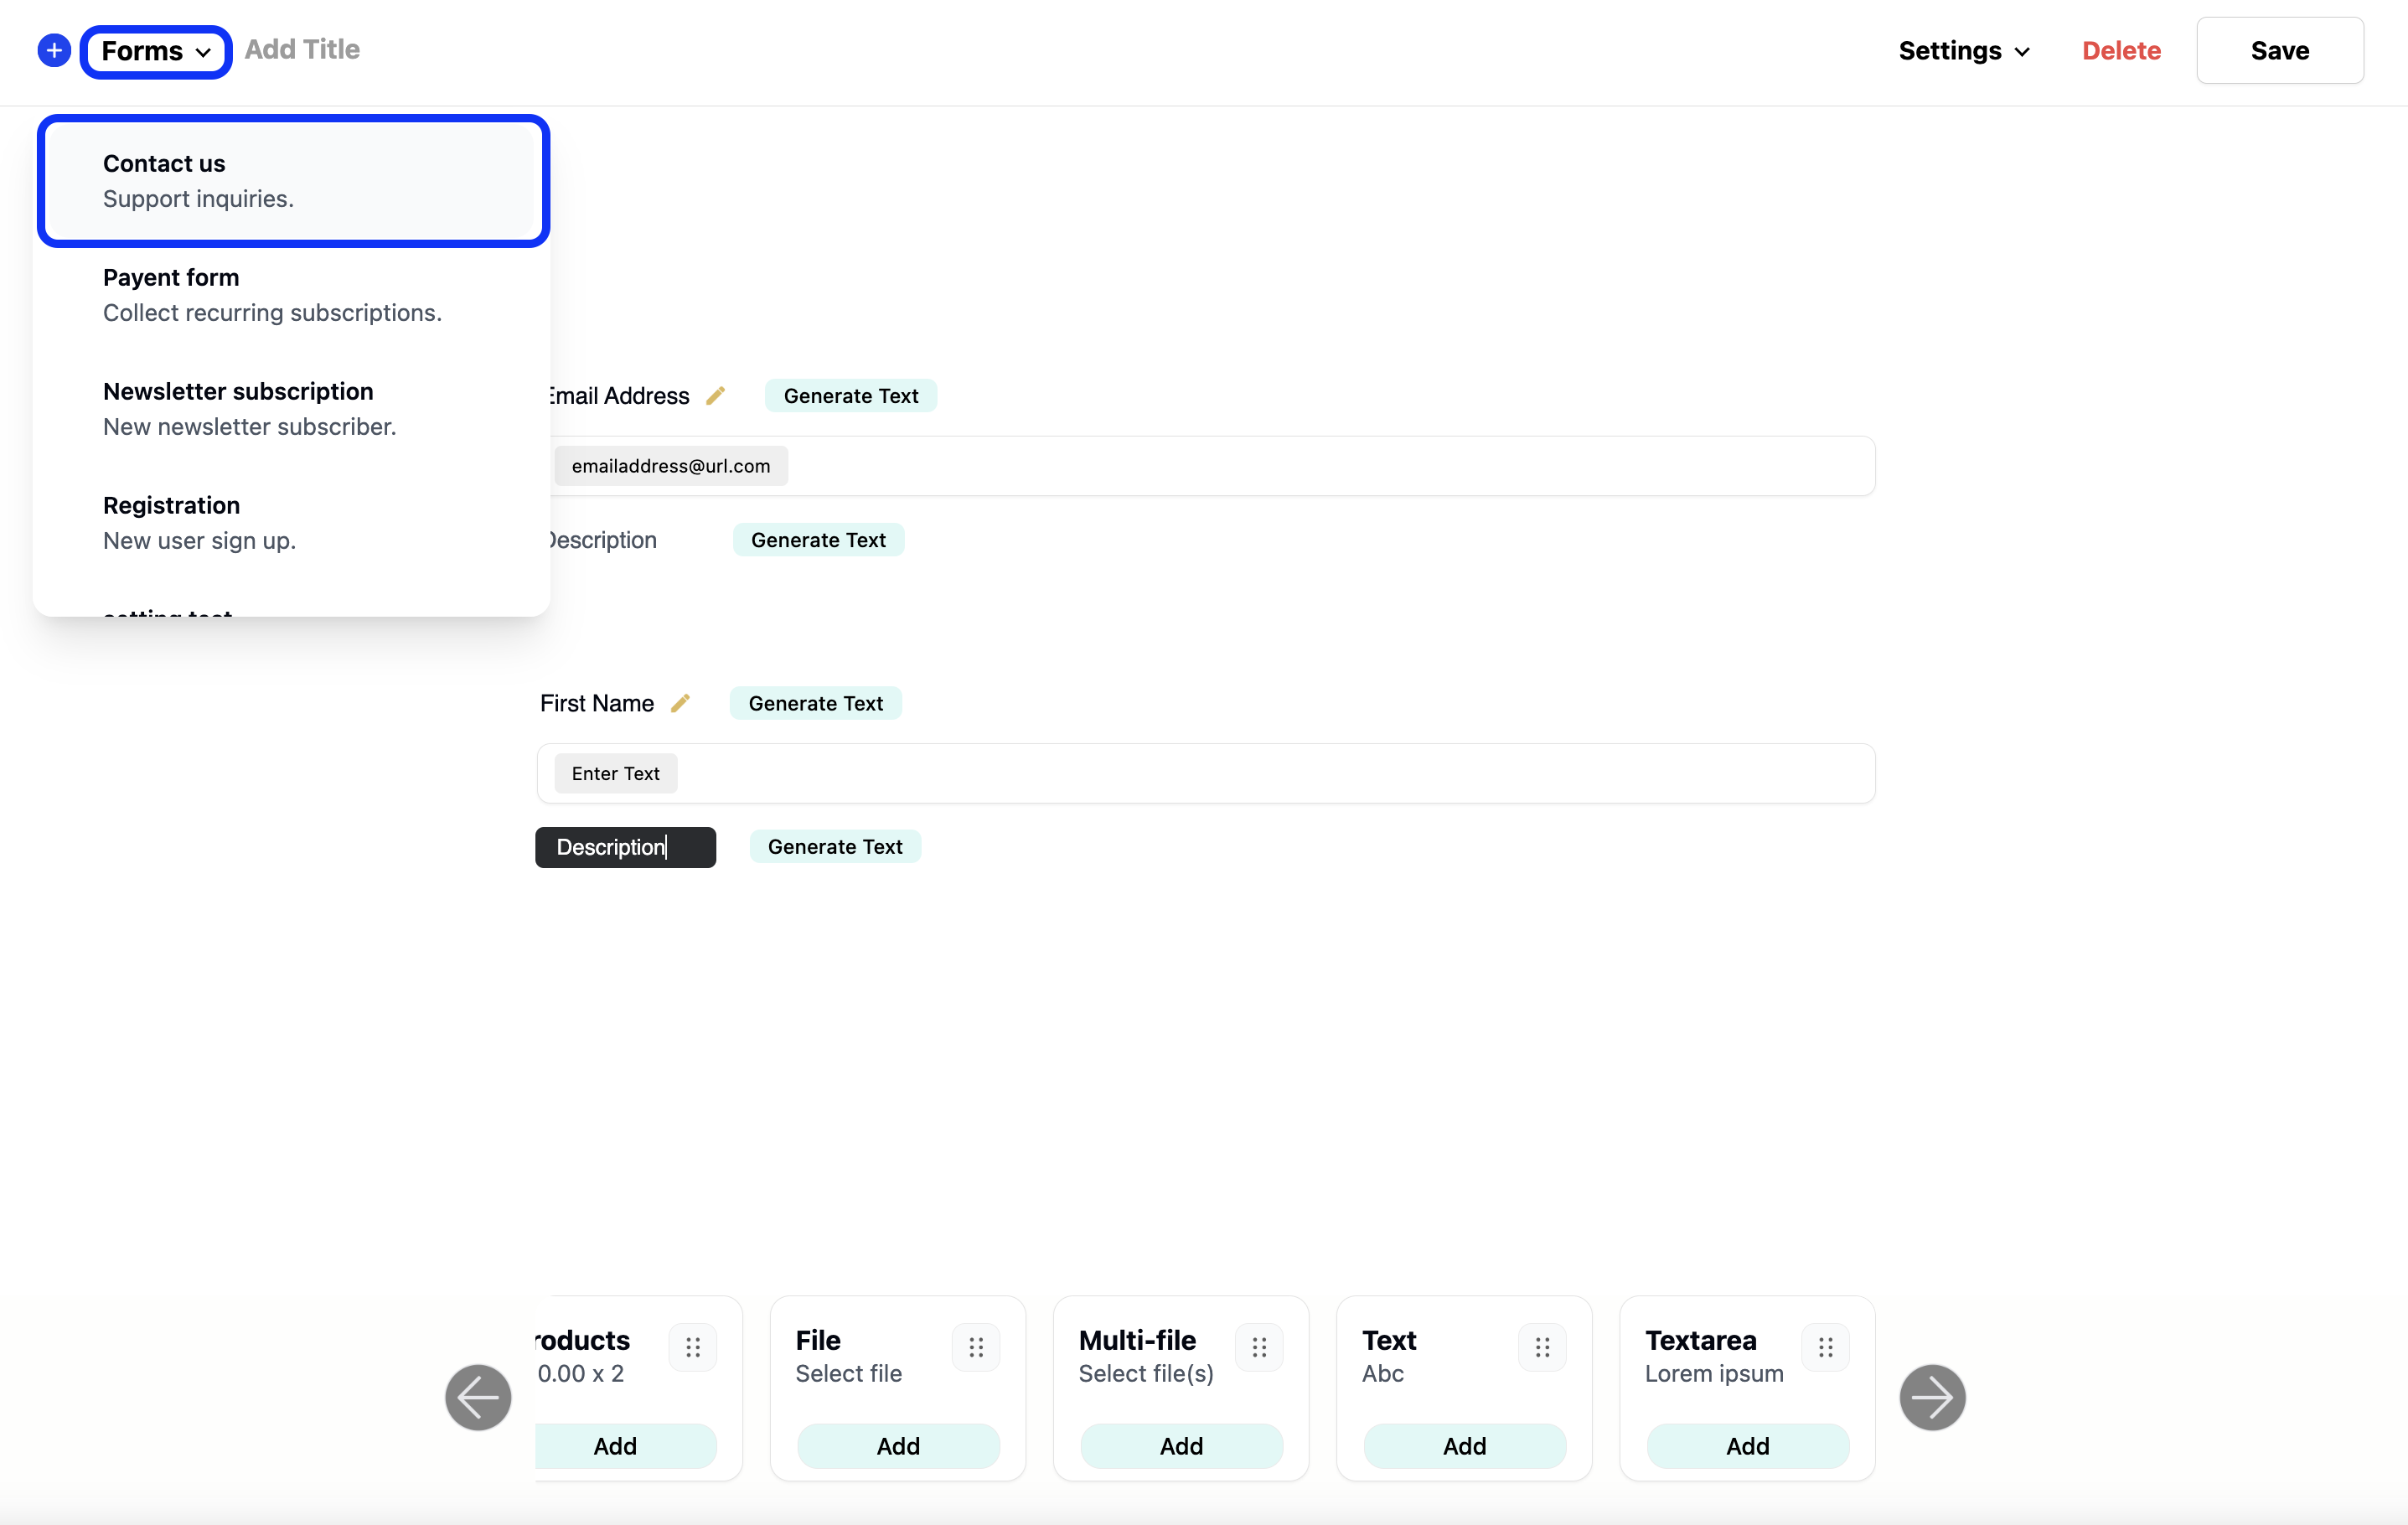
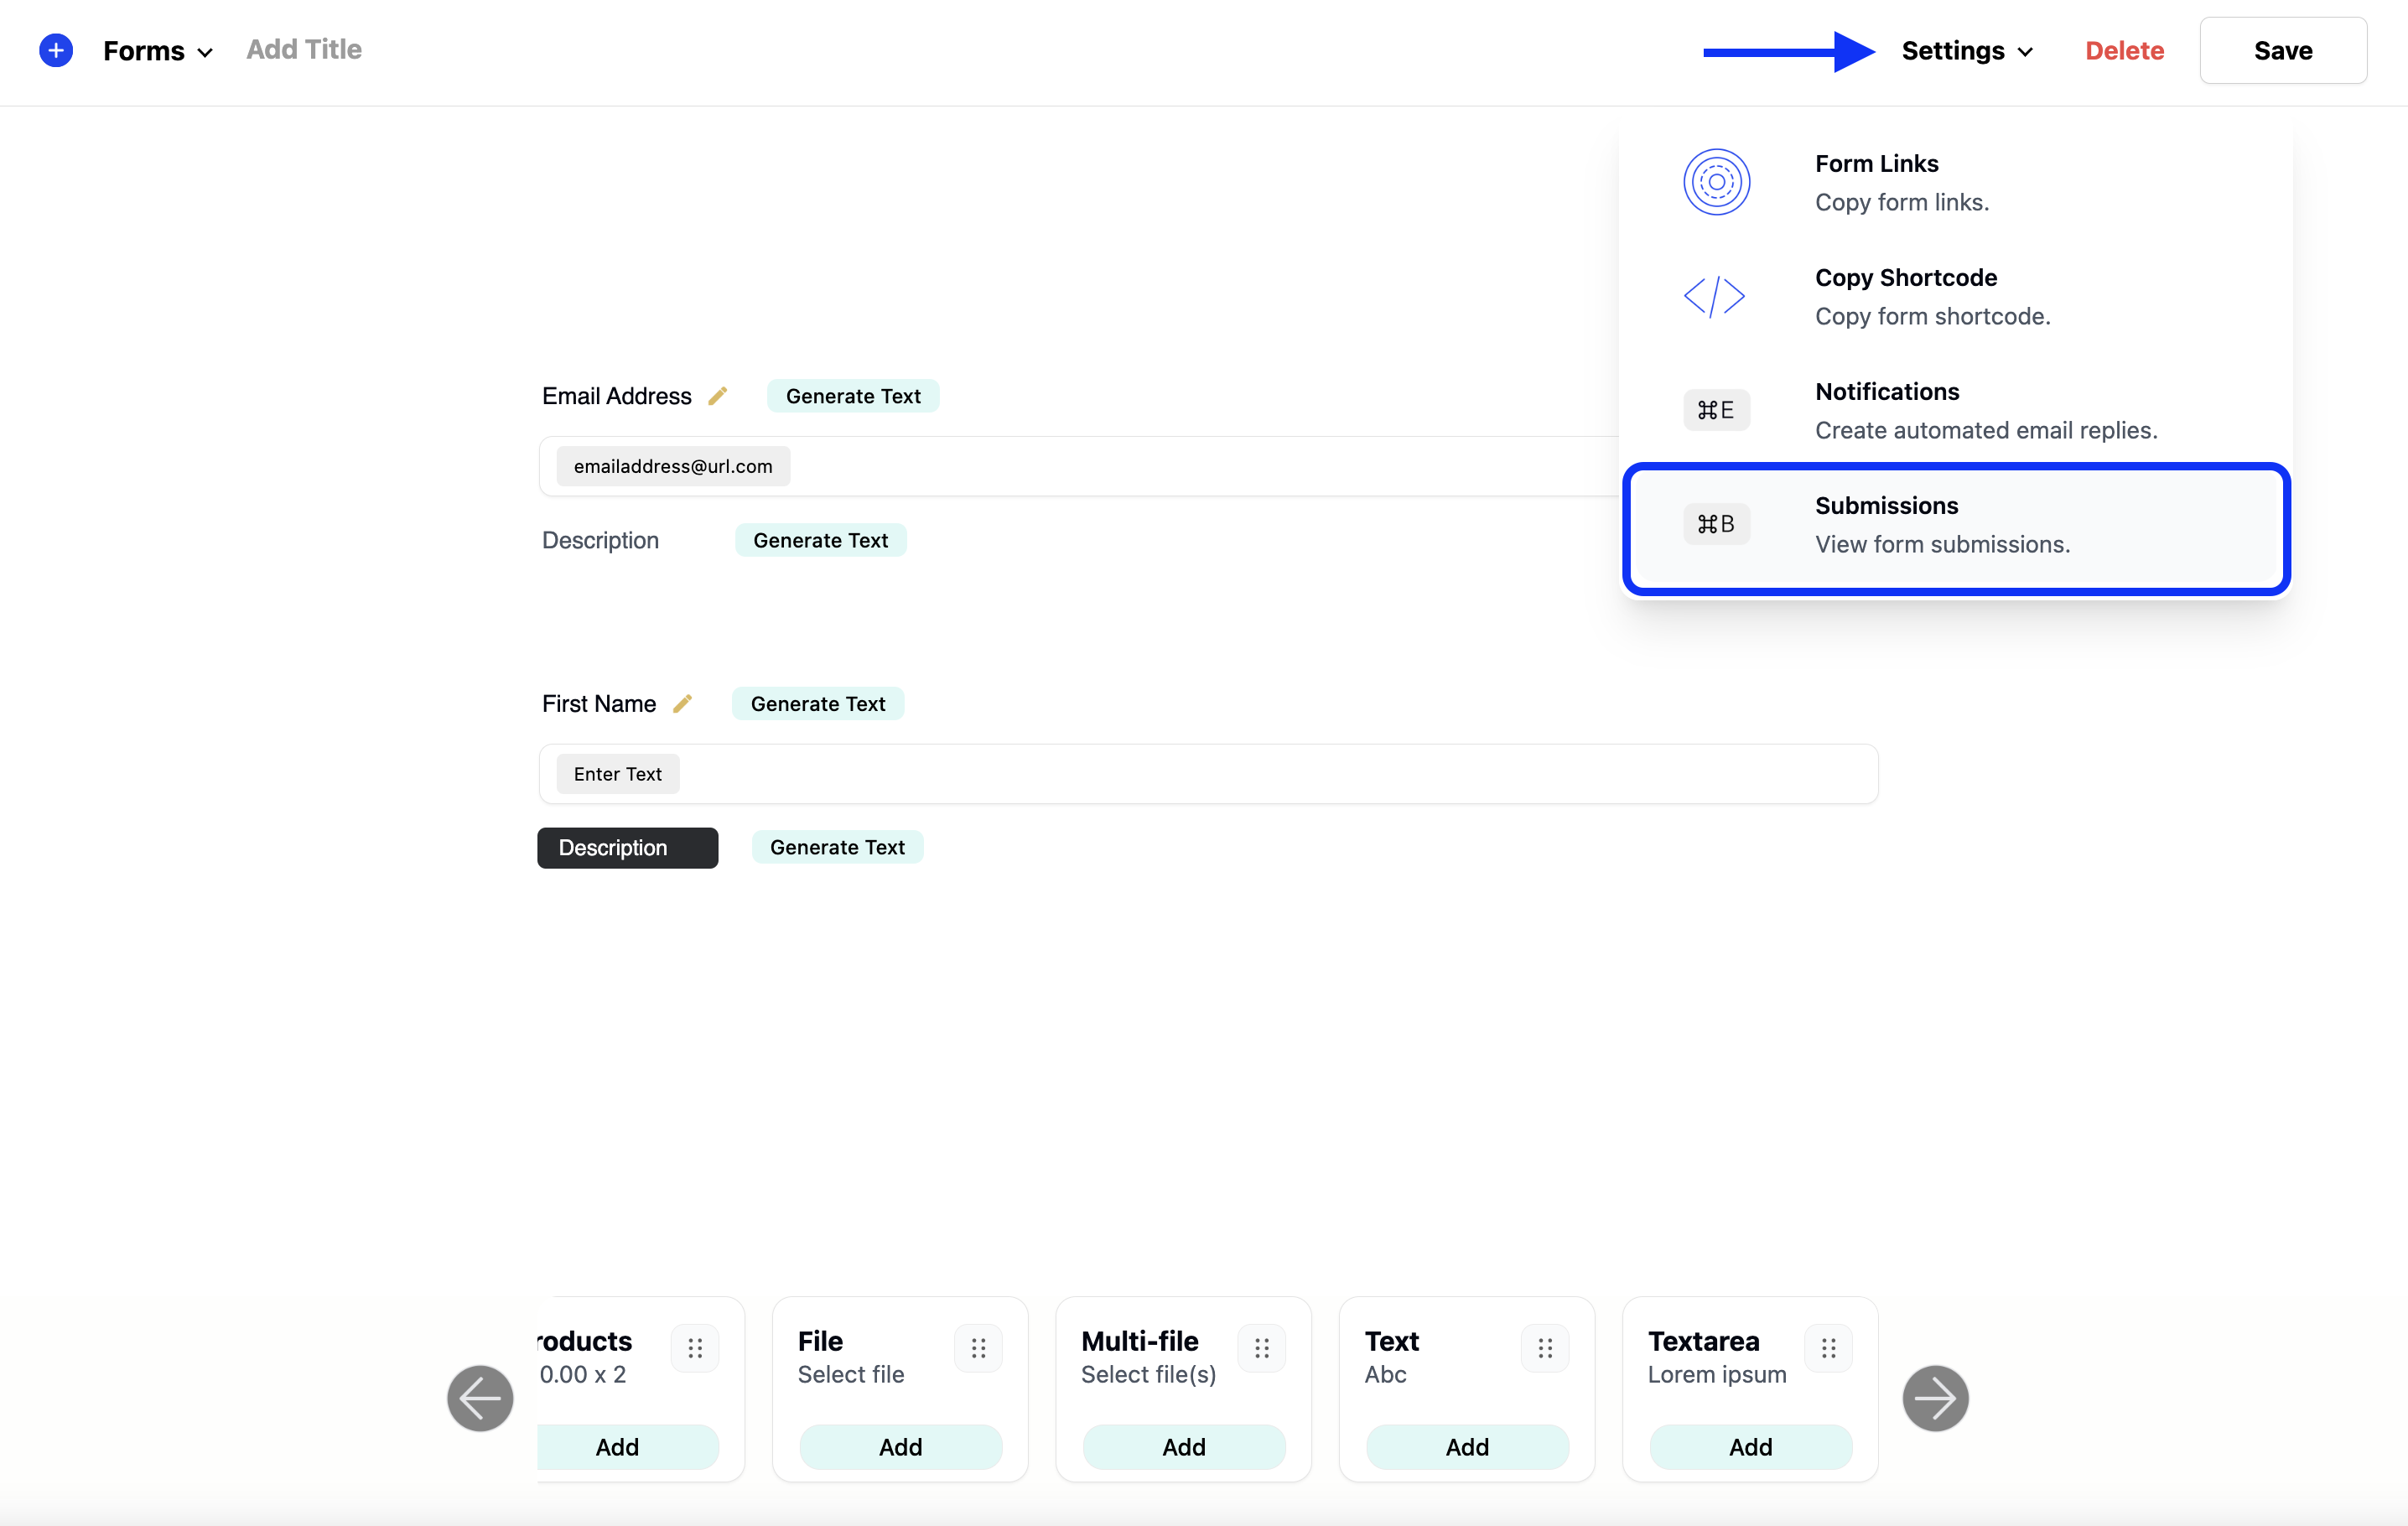
Once the form has been loaded, we can view our submissions for the current form, by hovering over the settings menu and selecting the submission's menu item. Or with the "command b" keyboard shortcut.
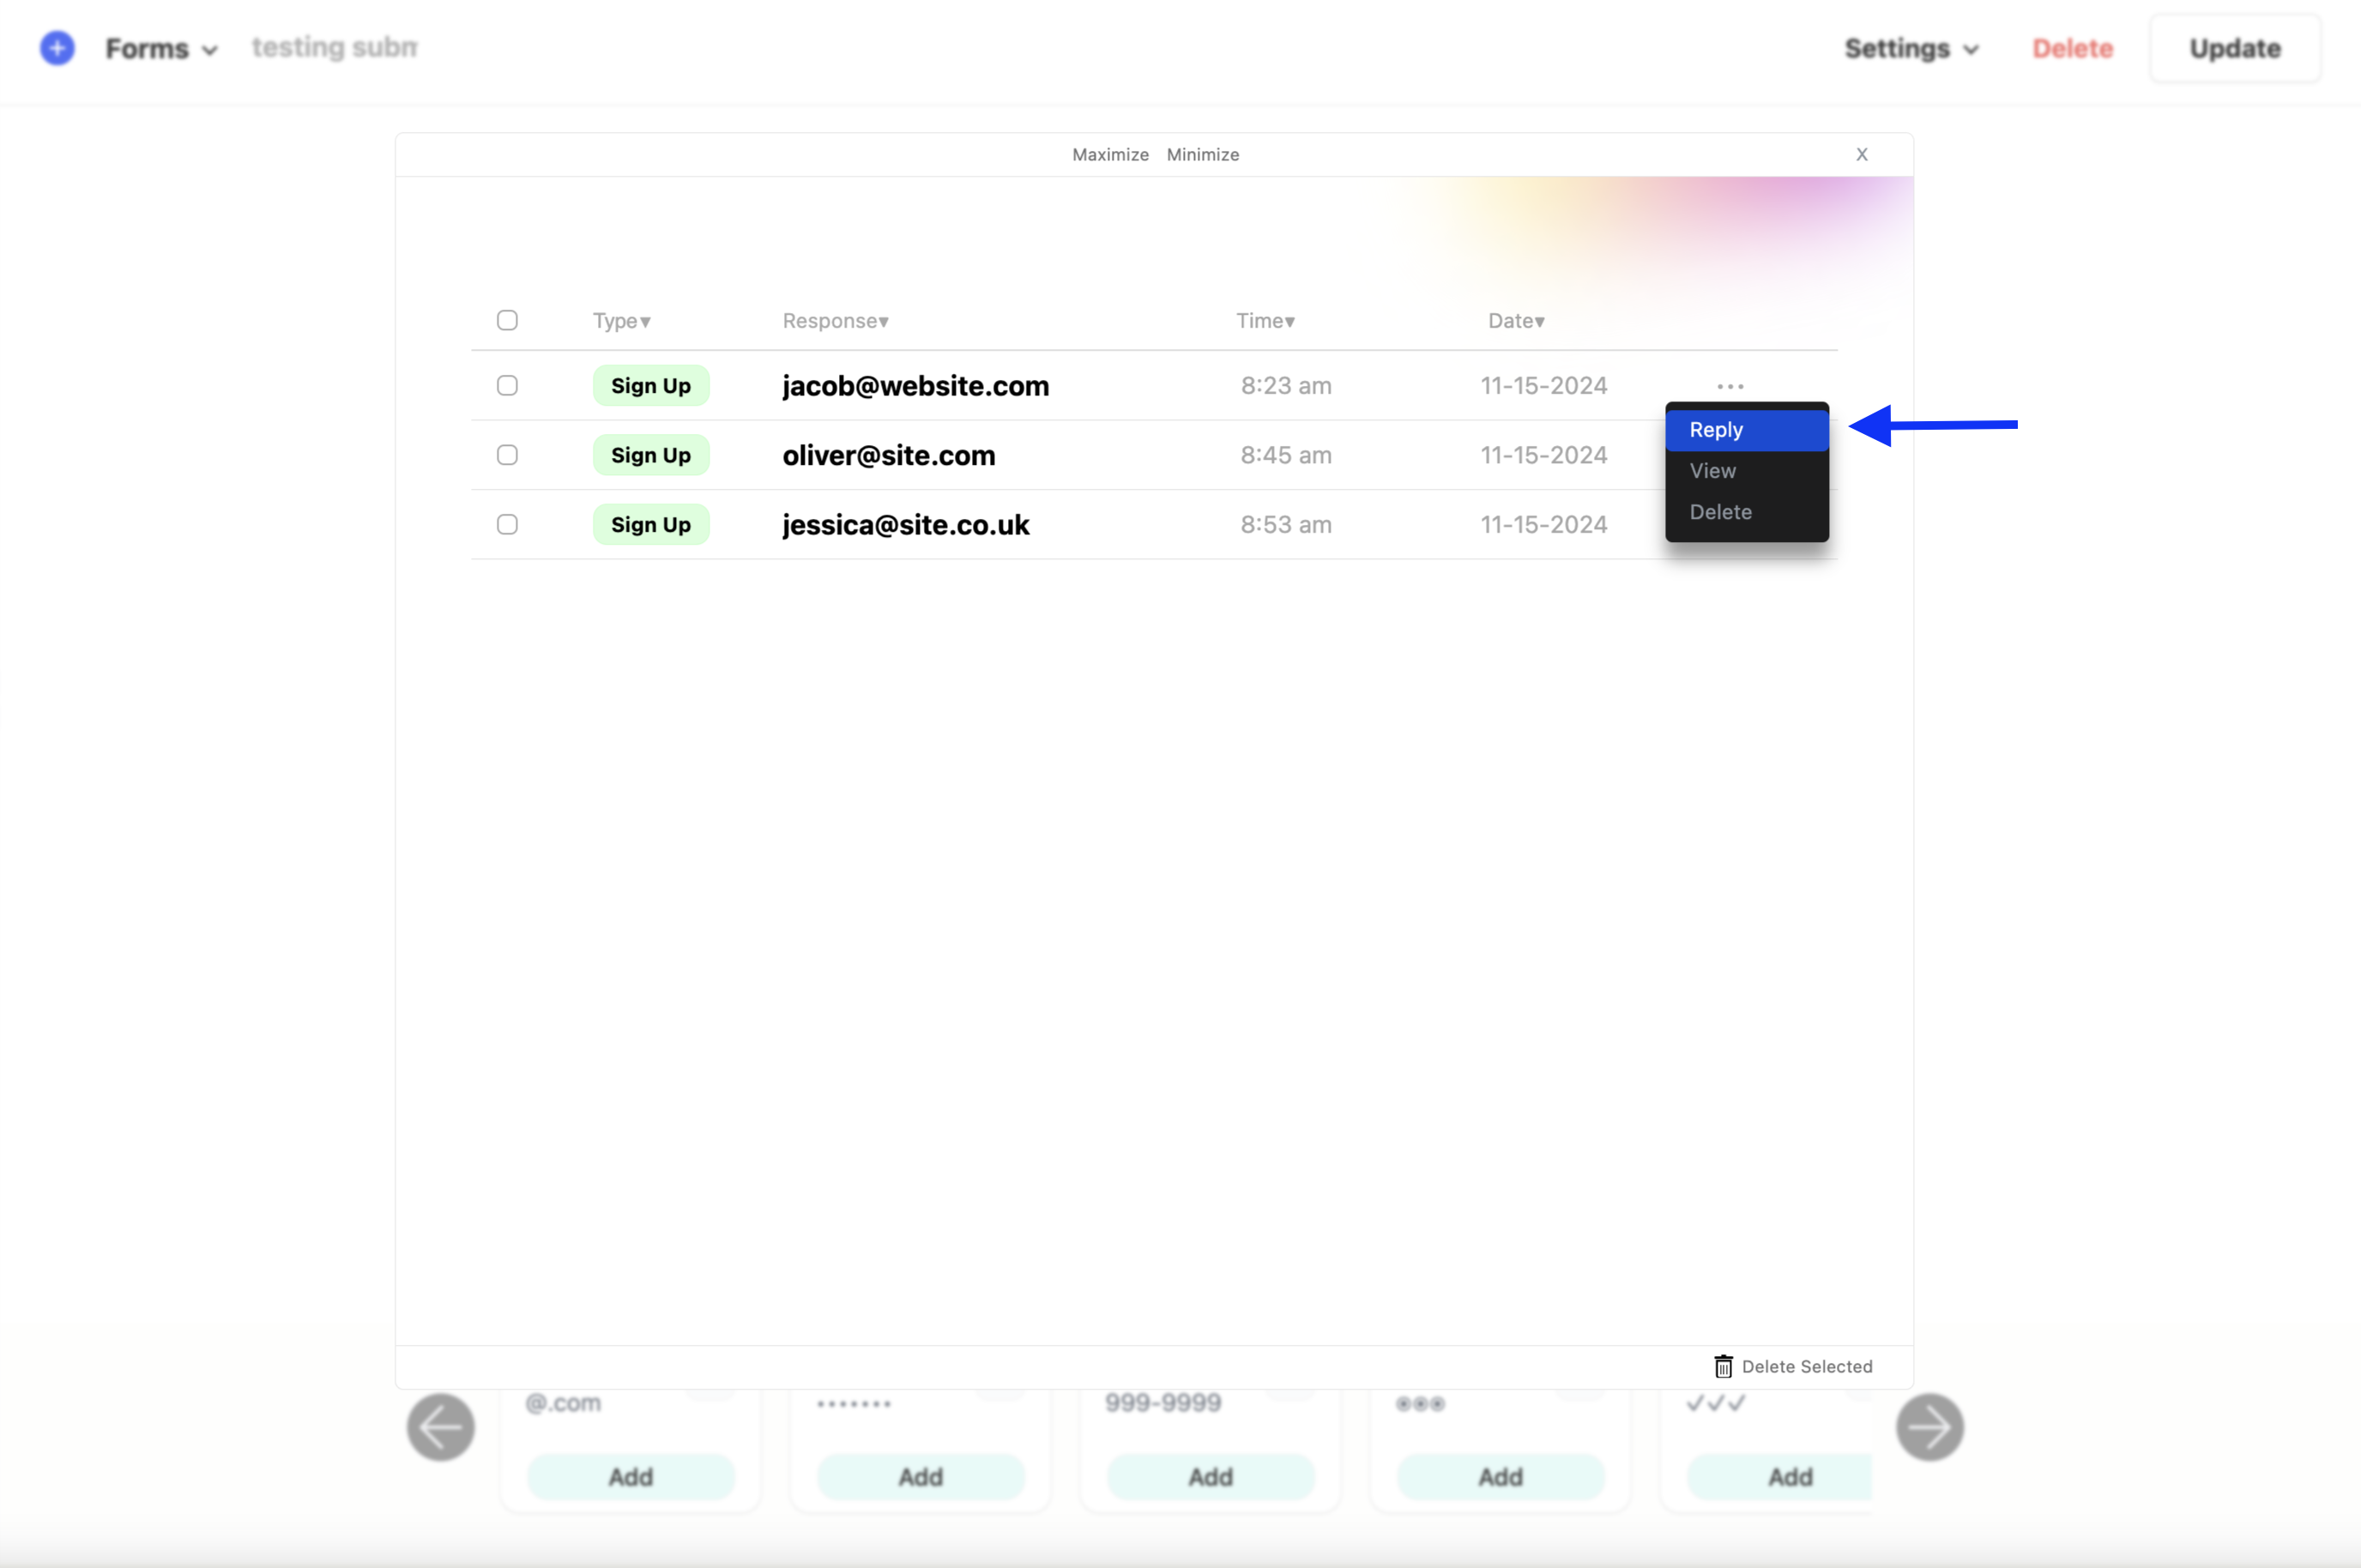
Submissions contain all information submitted with the form, including file uploads, and references each value by label. By default, Likeable Forms displays a snippet of information pertaining to the submission, to view the entire submission, including files, you can hover the 3 dots on the right side of the submission quick view and click the view option from the drop-down, or simply click anywhere on the quick view.

After reviewing a submission, you can optionally send a reply without closing the form builder by hovering over the 3 dots on the right of the submission and clicking the “Reply” option.
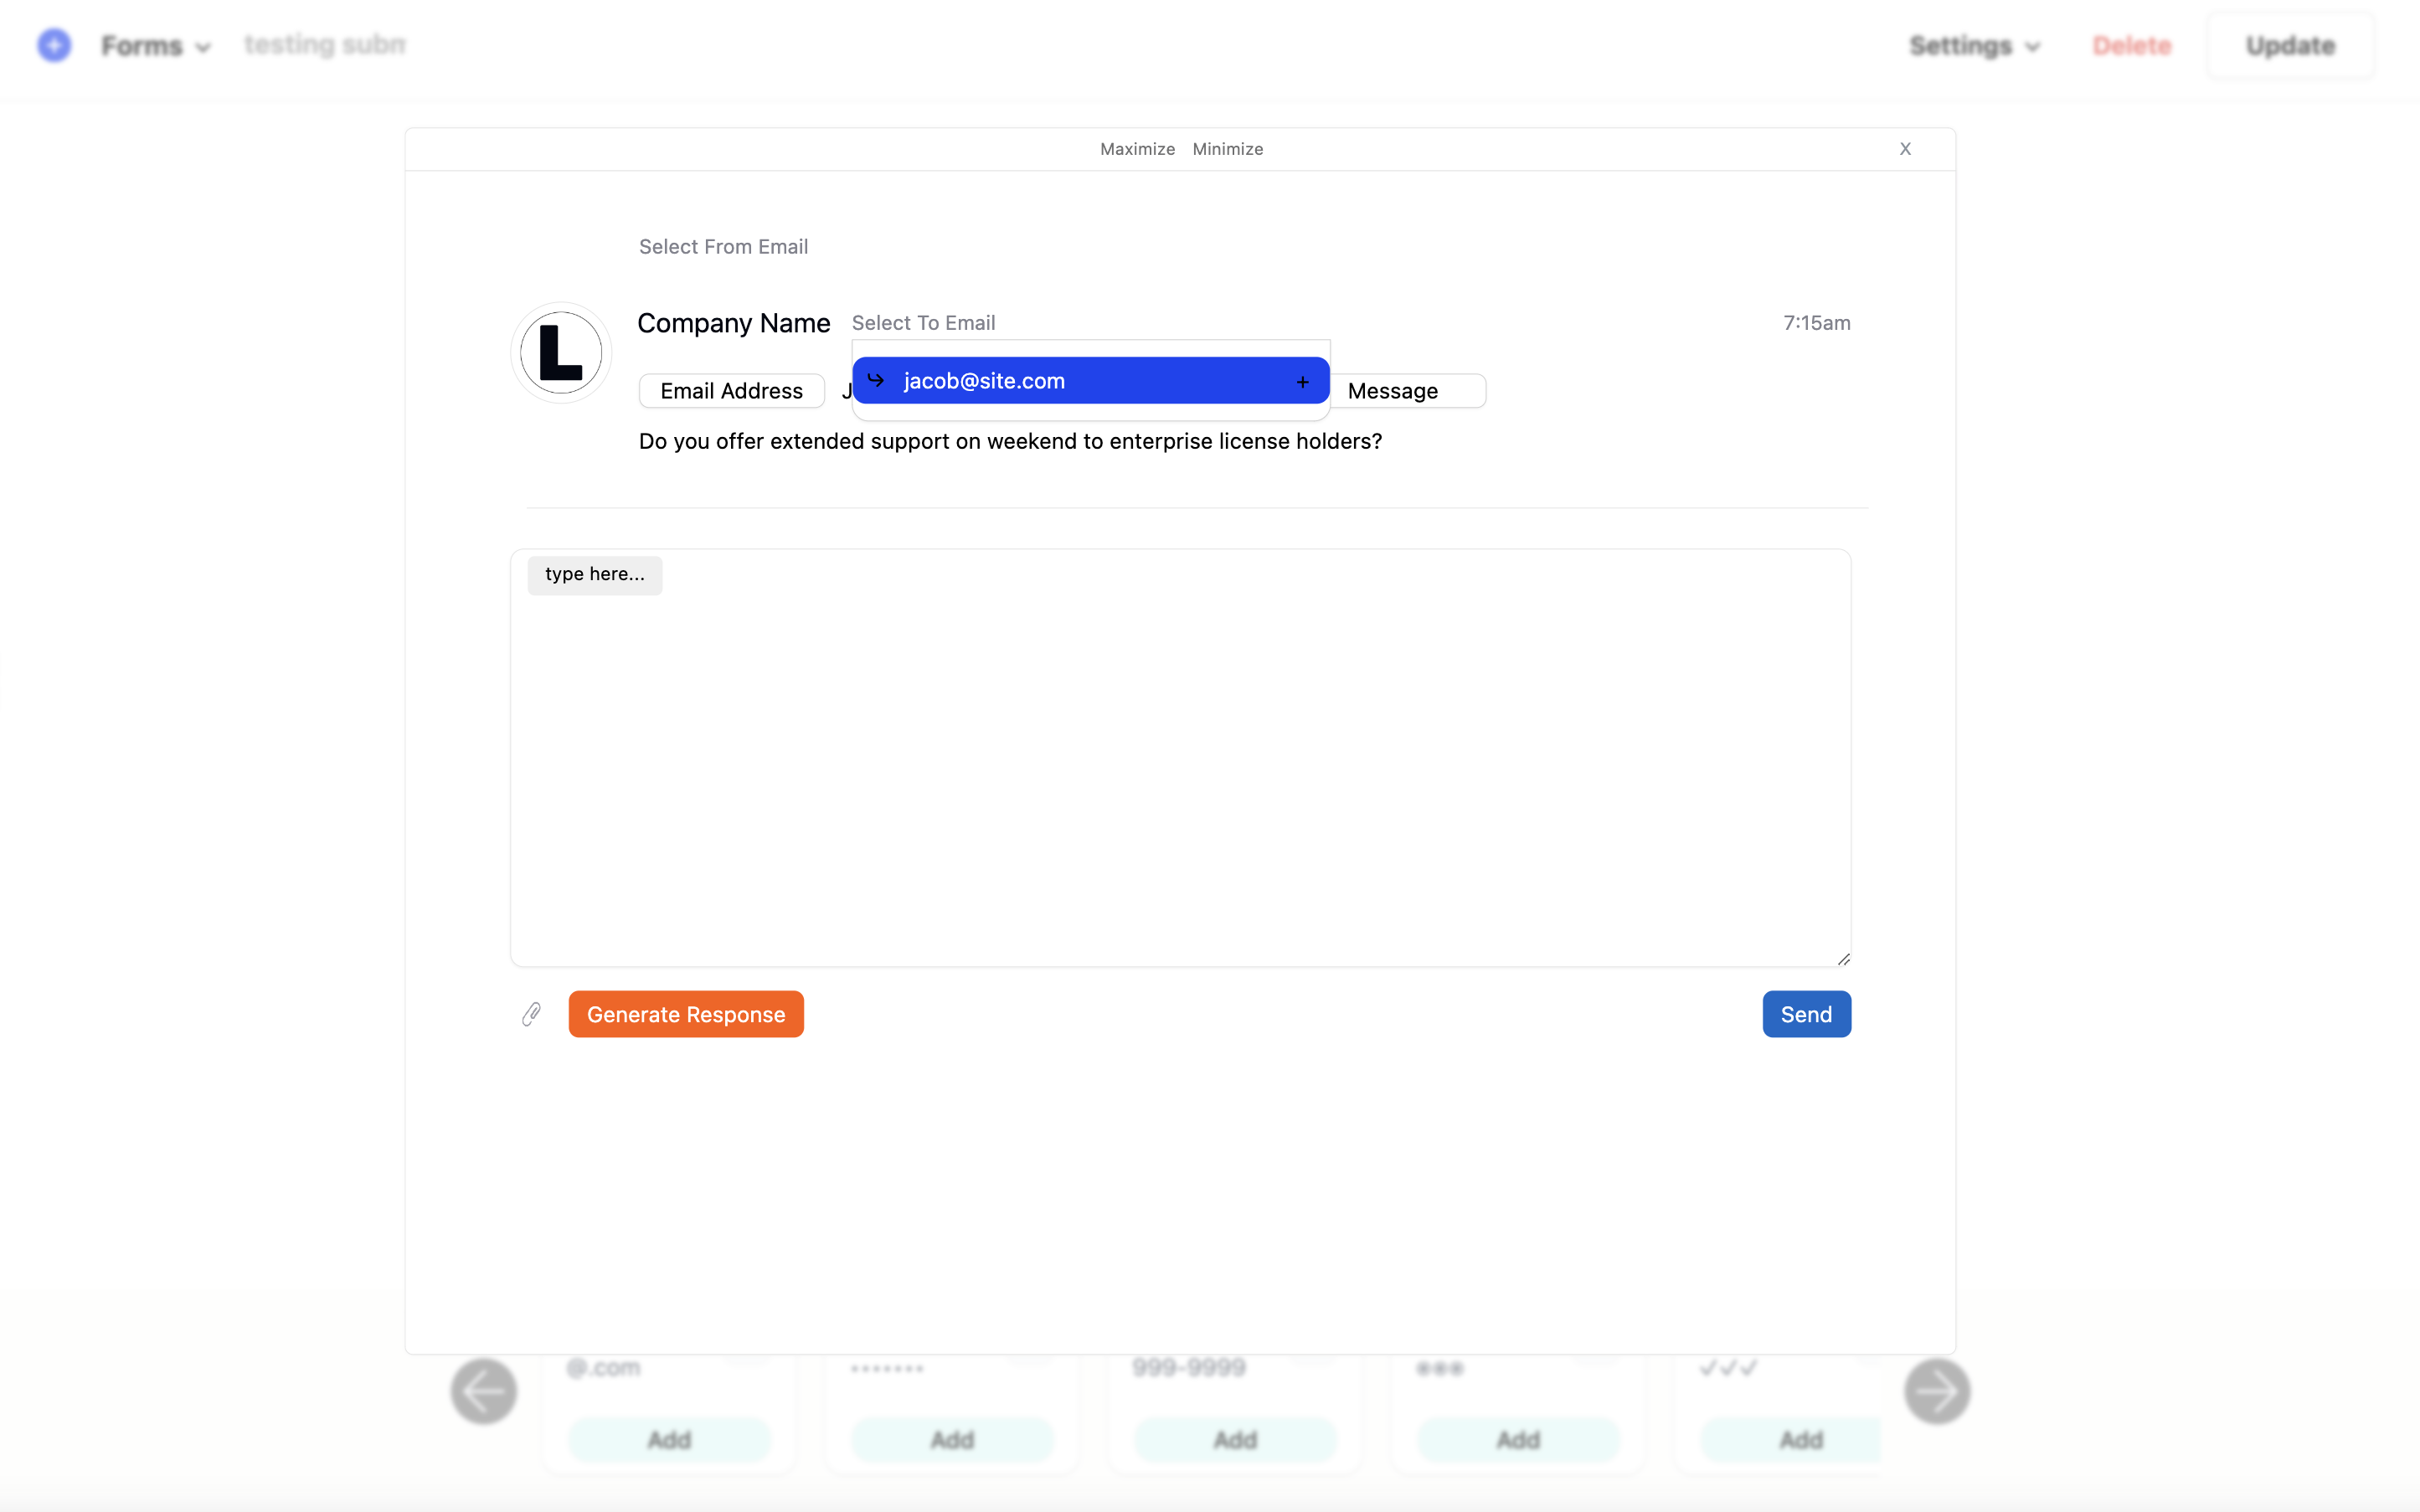
A reply includes the ability to send text replies, attachments, marked up screenshots, and/or files to the recipient.
The replies modal autopopulates relevant submission data to make sending emails more efficient and easier. For example, when clicking reply, the “from” email drop down contains all email addresses submitted with the current form submission. If you close the replies modal and open another reply for a separate submission, all new email addresses will be populated in the drop-down for you. Making it quicker to select an option as to who should receive the reply.
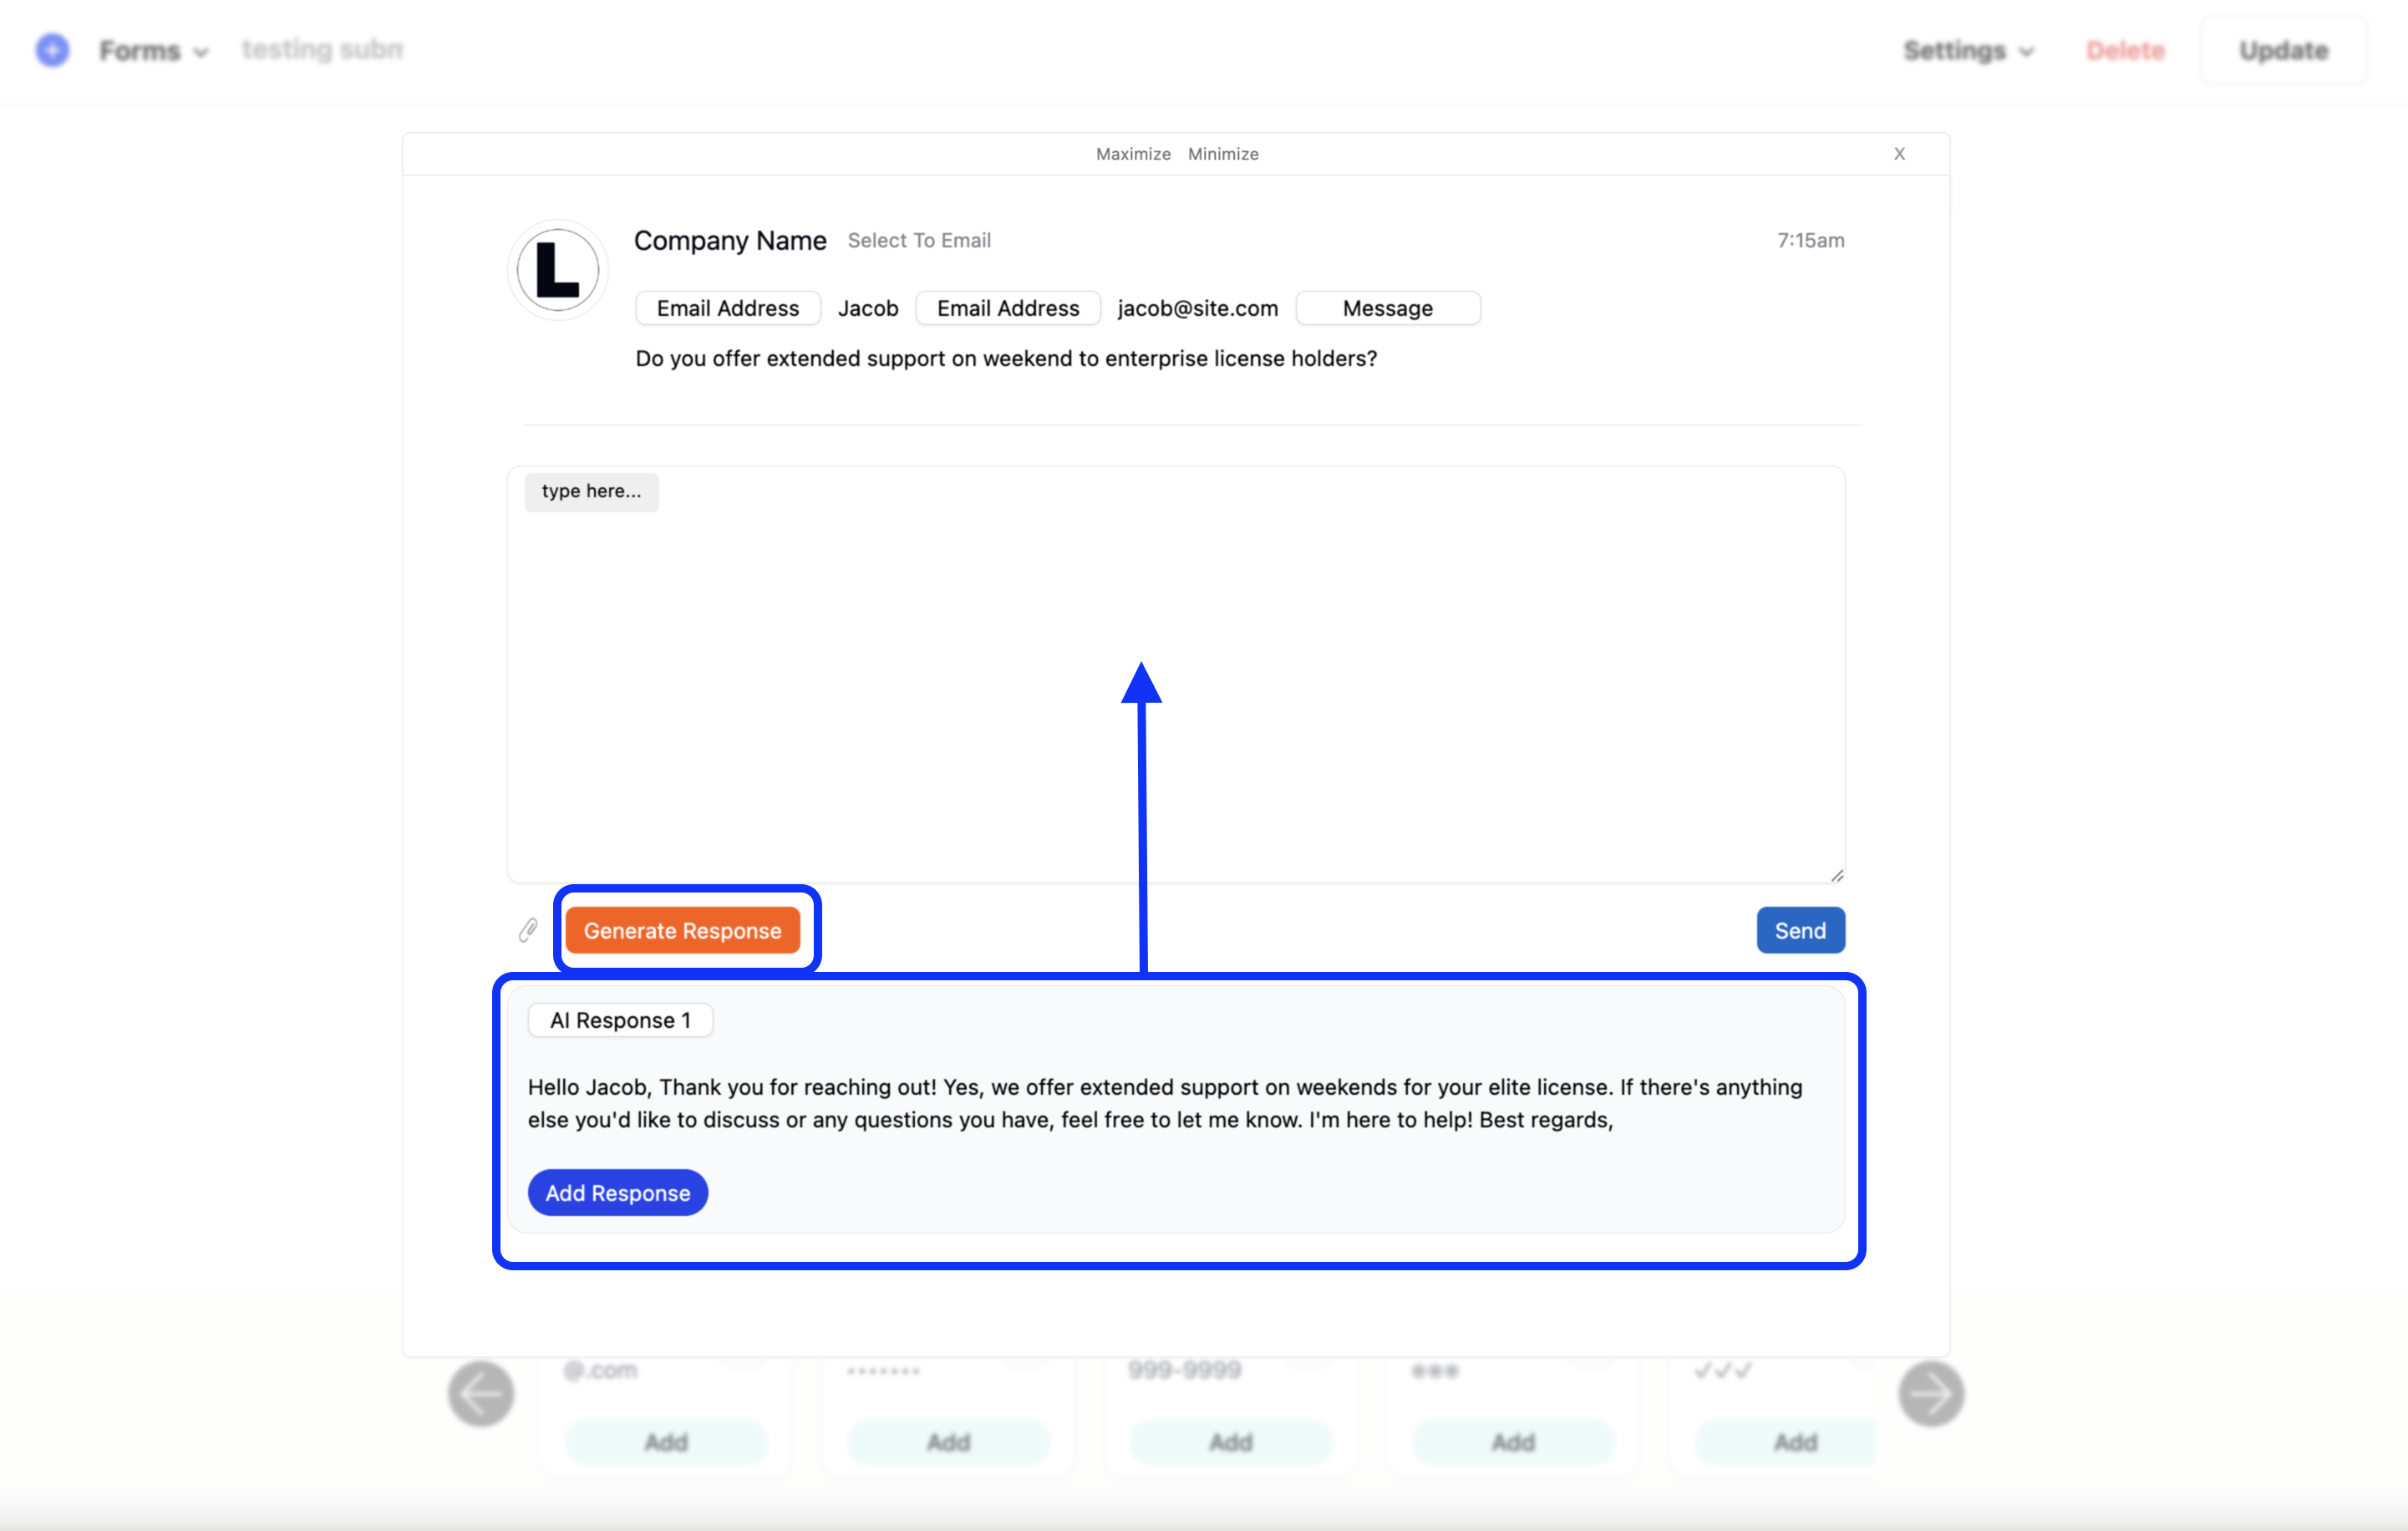
In addition, with the ChatGPT integration, instead of typing your own response, you can generate several AI responses to you as your reply.
When generating a canned response, all the submission data will be sent to the OpenAI API and will return a contextual human-readable response as an option. When you find a response that’s suitable, it’s as easy as clicking “add response” and then send. There’s no prompting, simply click “Generate response” and the ChatGPT integration will generate the contextual response for the entire submission.
Integrating a CRM solution
On occasion, you may have a sales pipeline or journey you need to add a customer to. Pipelines allow you to nurture a lead, complete various tasks to complete in order to close a sale, and manage customer contact information. By integrating a CRM, you can centralize customer data, improve customer retention, and increase sales.
In the past, in order to add a new contact and create new tickets in your CRM, you either had to forward an email or import your customer list with a CSV file. Today, Likeable Forms currently offers 9 CRM integrations that automate this task. You can view a full list of available CRM solutions by visiting the integration's marketplace.
By default, all Likeable Forms CRM integrations offer the ability to create new tickets with attachments intact. In addition, you can map form submission data to automatically create new contacts or update a contact if one already exists inside your CRM. Field mapping customer contact information works the same as it does for creating default notifications and sending replies.
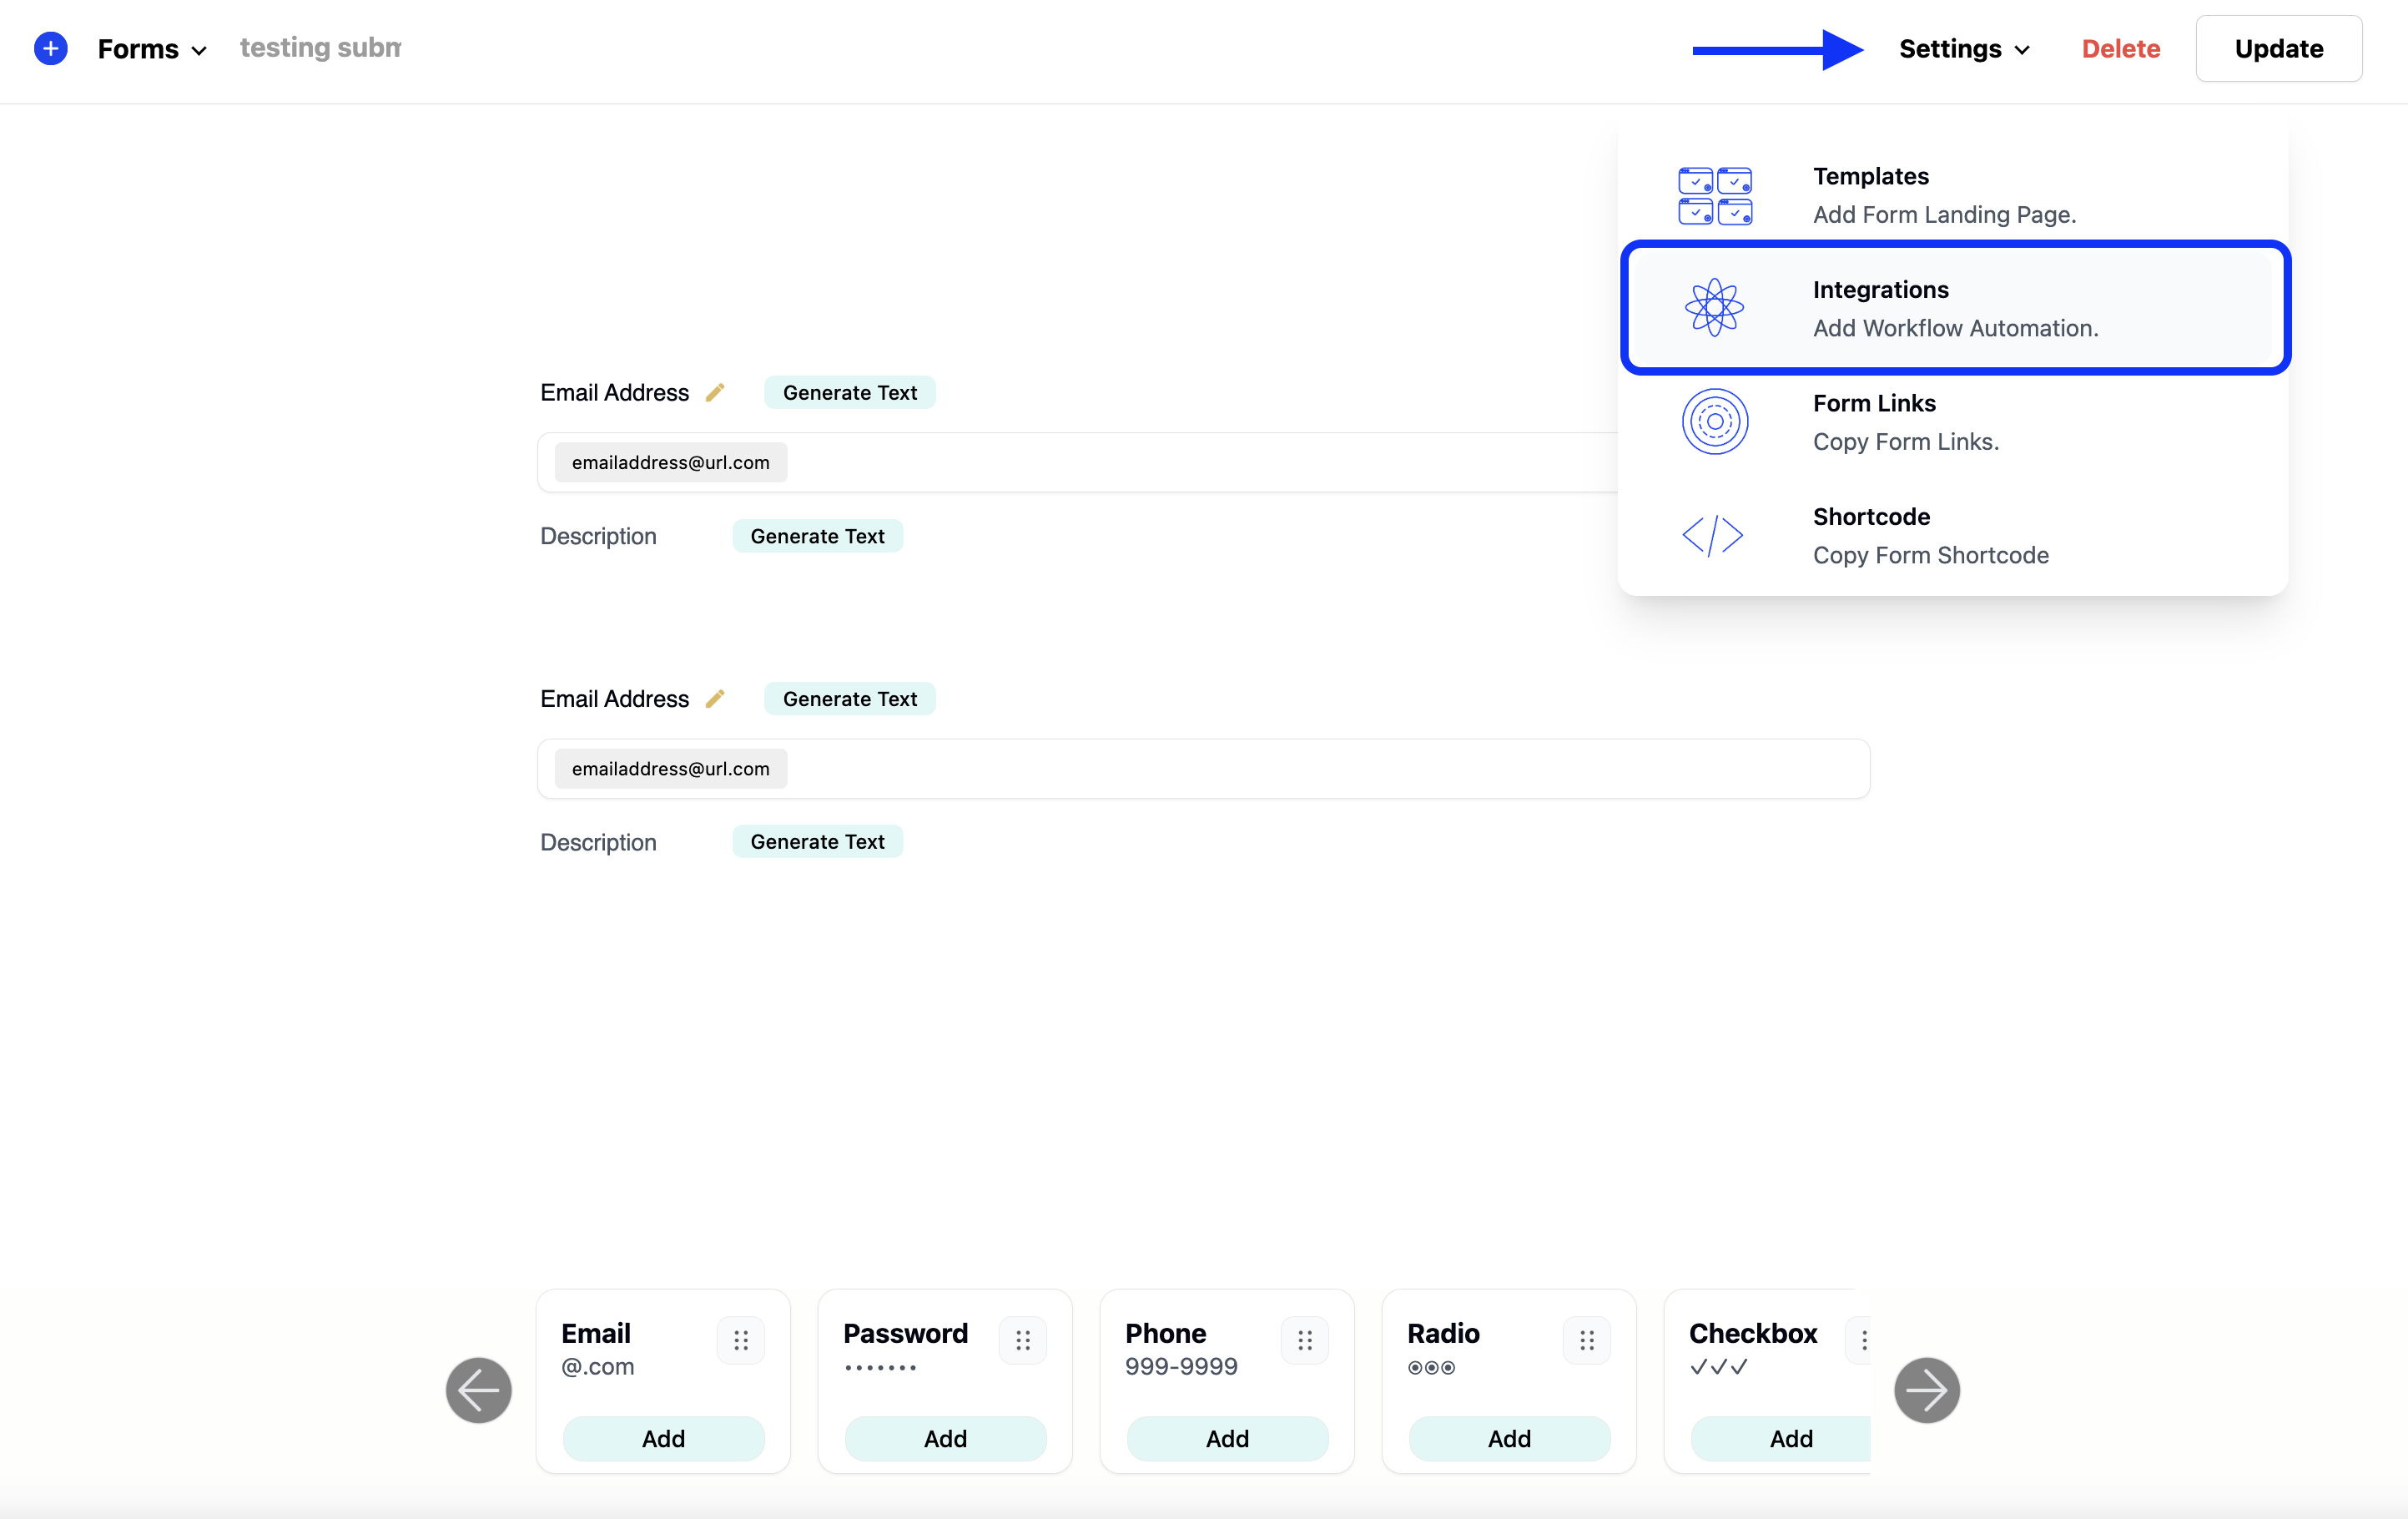
Accessing your CRM plugins settings inside the form builder. First make sure to install and activate your CRM plugin on your WordPress website and then open the form builder. If the plugin is already activated, you can access its settings by hovering over the settings menu item in the top navigation bar, and then by selecting the integration's menu item.
Scroll down until you find your CRM company and click on its logo.
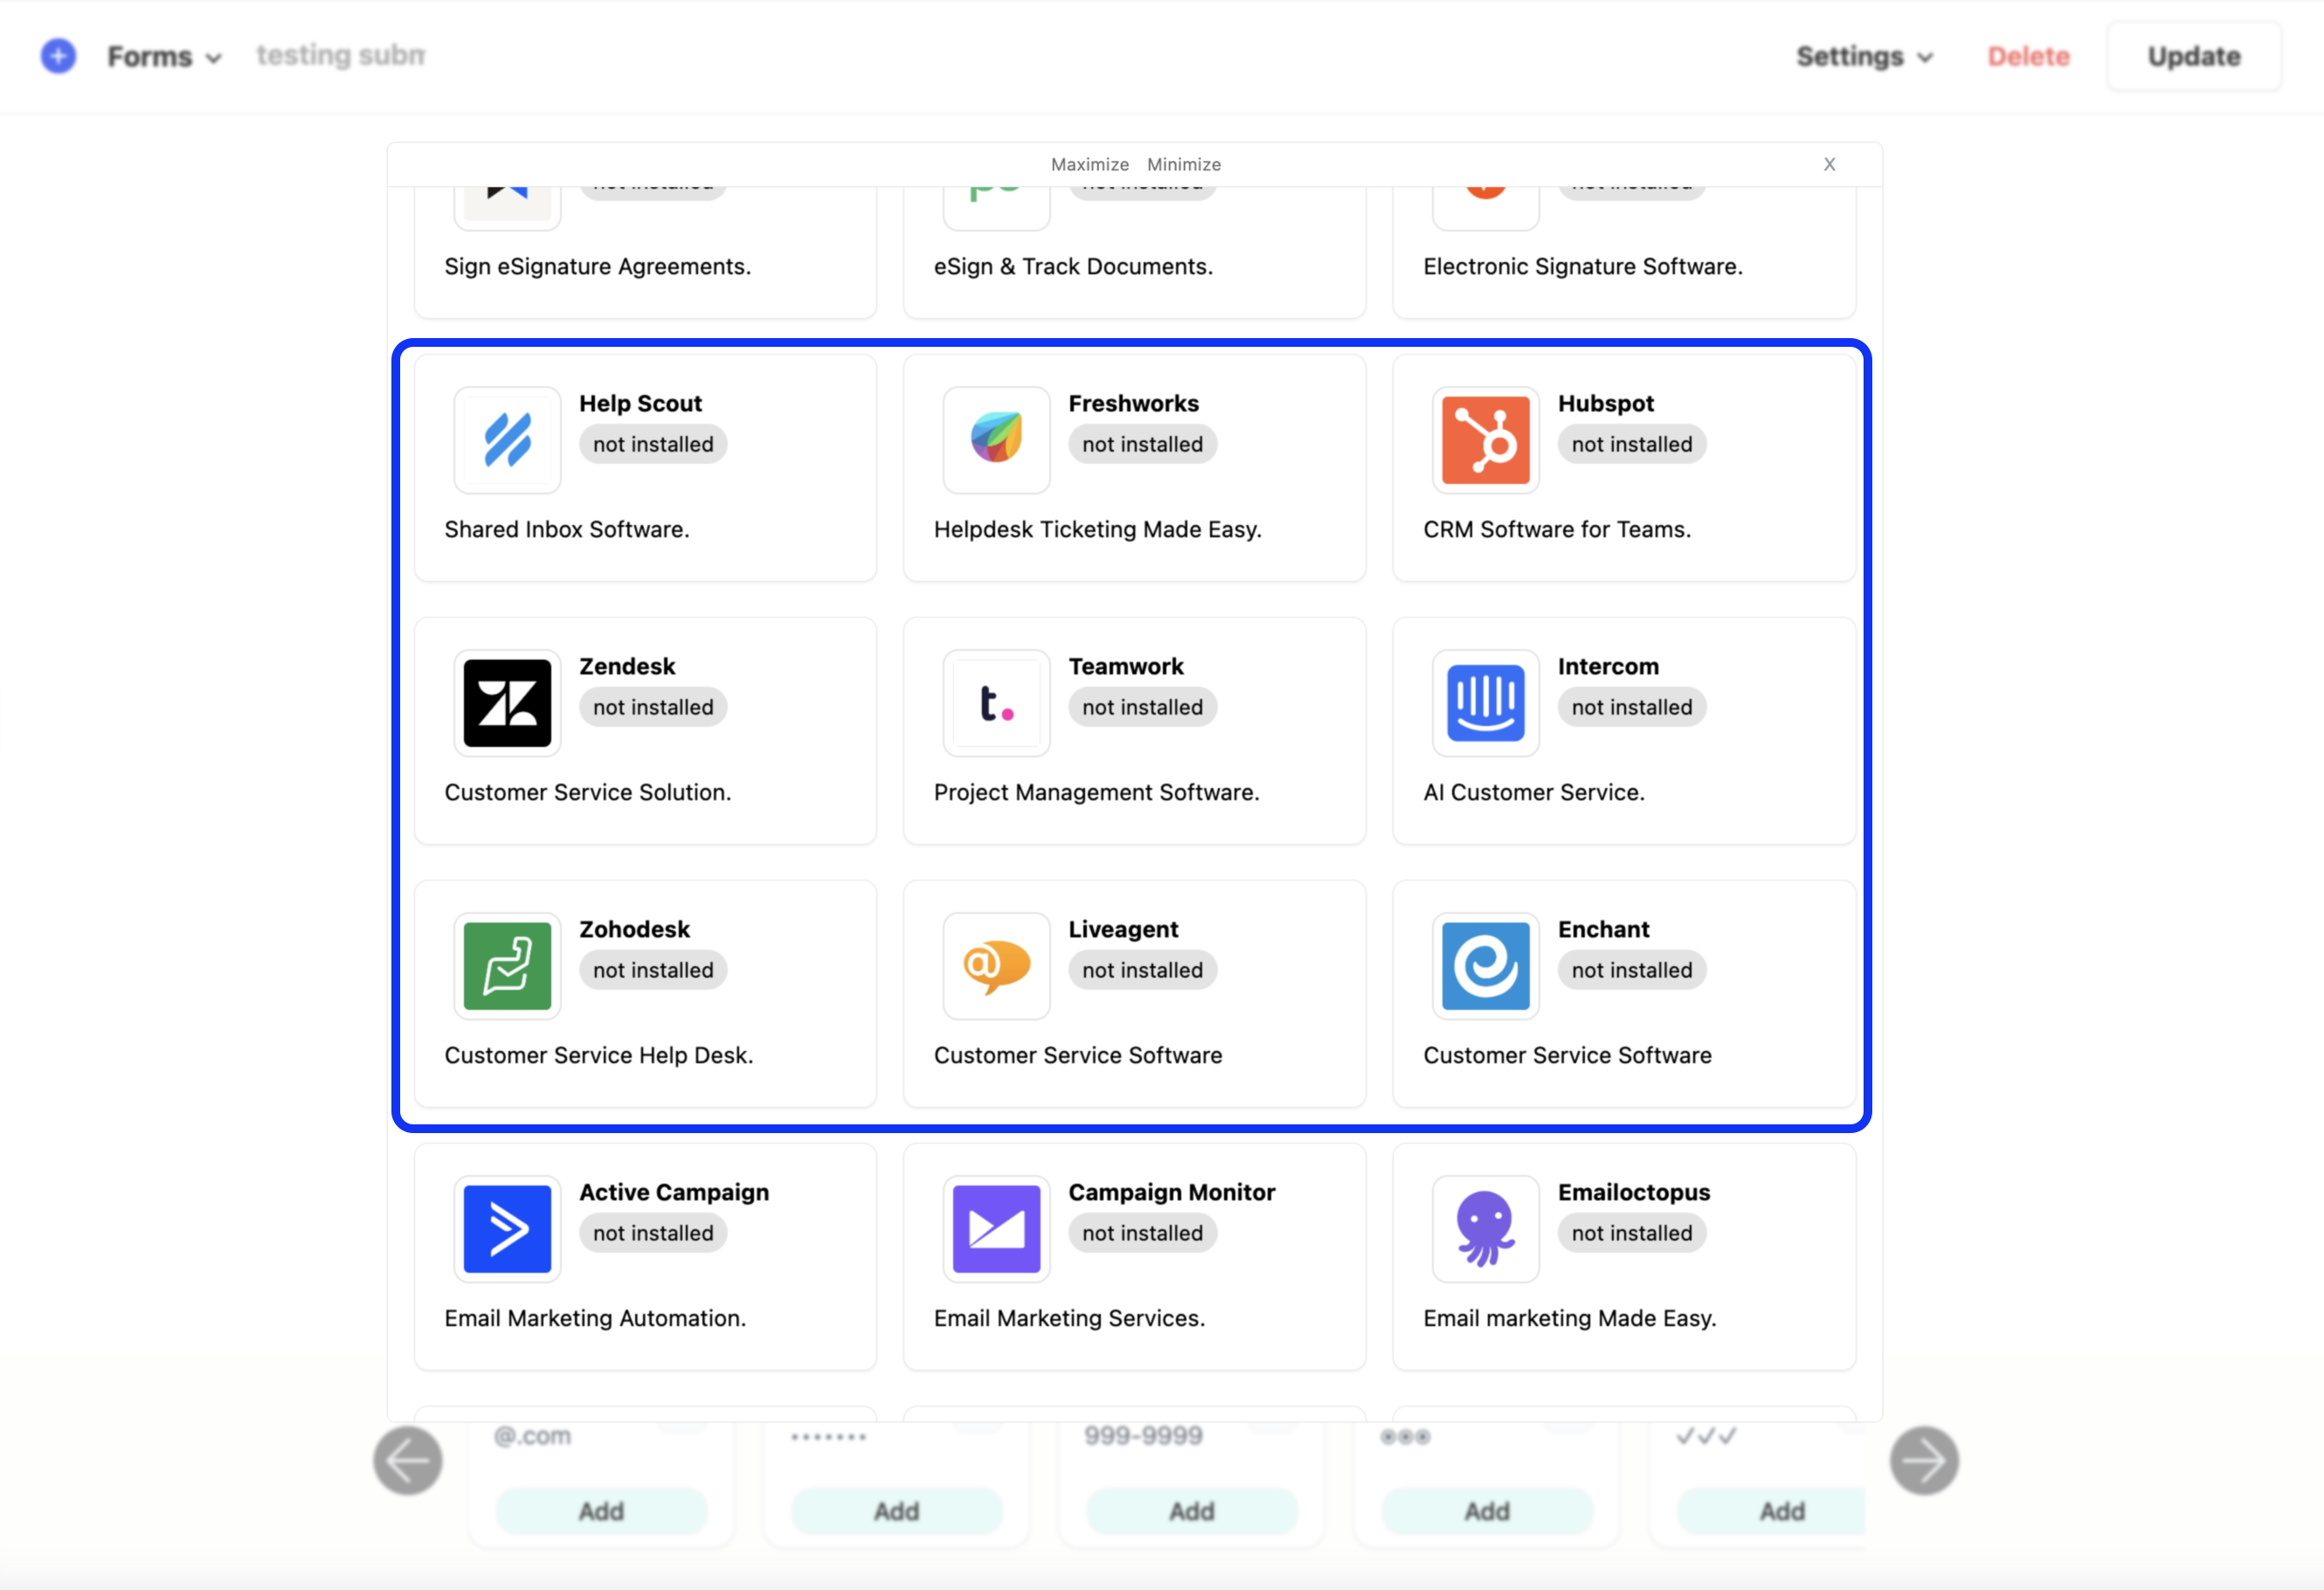
Depending on your CRM, you may need to enter an API Key or auth token.
After mapping the customer's information, when a new form submission is received, the integration will automatically create a new ticket and contact for you.
CRM features vary by CRM and the API endpoints they offer. In general, they offer similar features, but some may offer the ability to add tags, start drip campaigns, and send automated messages.
